As a working mother who tries to run a few times a week, write in my blog and keep my family from starving or looking unacceptably dirty, my time is limited. I tend to paint in bursts, my least favorite part is figuring out what to paint and followed by how to frame my work. I still don’t have a good plan for how to frame them, I have a pile sitting in my workspace as I type.

One great way to be inspired is to watch a YouTube tutorial. I have mentioned some of the artists I subscribe to here.

Many of my painting are water scenes painted from my own photographs. As a life-long student, I love to watch and learn from other artists including how they paint water. Often times I will just watch the video and not even paint. I have painted this Grant Fuller tutorial a few times and think he gives great tips about painting wet sand and creating the a “water’s edge.”

Overview of the tutorial

  1. Do a quick pencil sketch, I pause the opening frame of the video and draw my sketch. The pencil lines won’t show in the final painting but try to keep them out of the sky!
  2. Wet the horizon and sky blending into the distant tree line is fine as we will be going over it with a darker pigment.
  3. I didn’t have cadmium orange but used gold ochre to create the distant light on the horizon. The use of cobalt blue and the gold ochre creates an interesting grey/blue that I wouldn’t have come up with on my own. I tend to use ultramarine or windsor blue in my skies and have started to use cobalt more to create some nice colors without the granulation that comes from the ultramarine.
  4. Let the sky dry. If you don’t you will get bleed. Sometimes we want bleed, in this case we do not.
  5. For the background, I used a cobalt blue, yellow ochre with a touch of burnt sienna. You want this layer to look misty so don’t put it on too dark.
  6. The whites are so important when you are painting waves, you can always go back and add more “water” but it’s much more difficult to get back to white! The thin layer of white against the distant shore is essential.
  7. Burnt sienna and ultramarine for the rocks
  8. When using the UM and BS on the water’s edge, go easy! Leave some gaps, better to add more than to have dark globs. Light touch is the key here. This step is what really makes the water “pop” and gives depth to the painting.
  9. Let everything dry and then wet the entire bottom portion of the paper, use the ultramarine and burnt sienna again to make a gradient in the wet paper, more blue at the water’s edge and more brown towards the drier sand at the bottom.
  10. Use a clean brush to create breaks in the sand adding reflective elements and giving the sand a “wet” appearance.

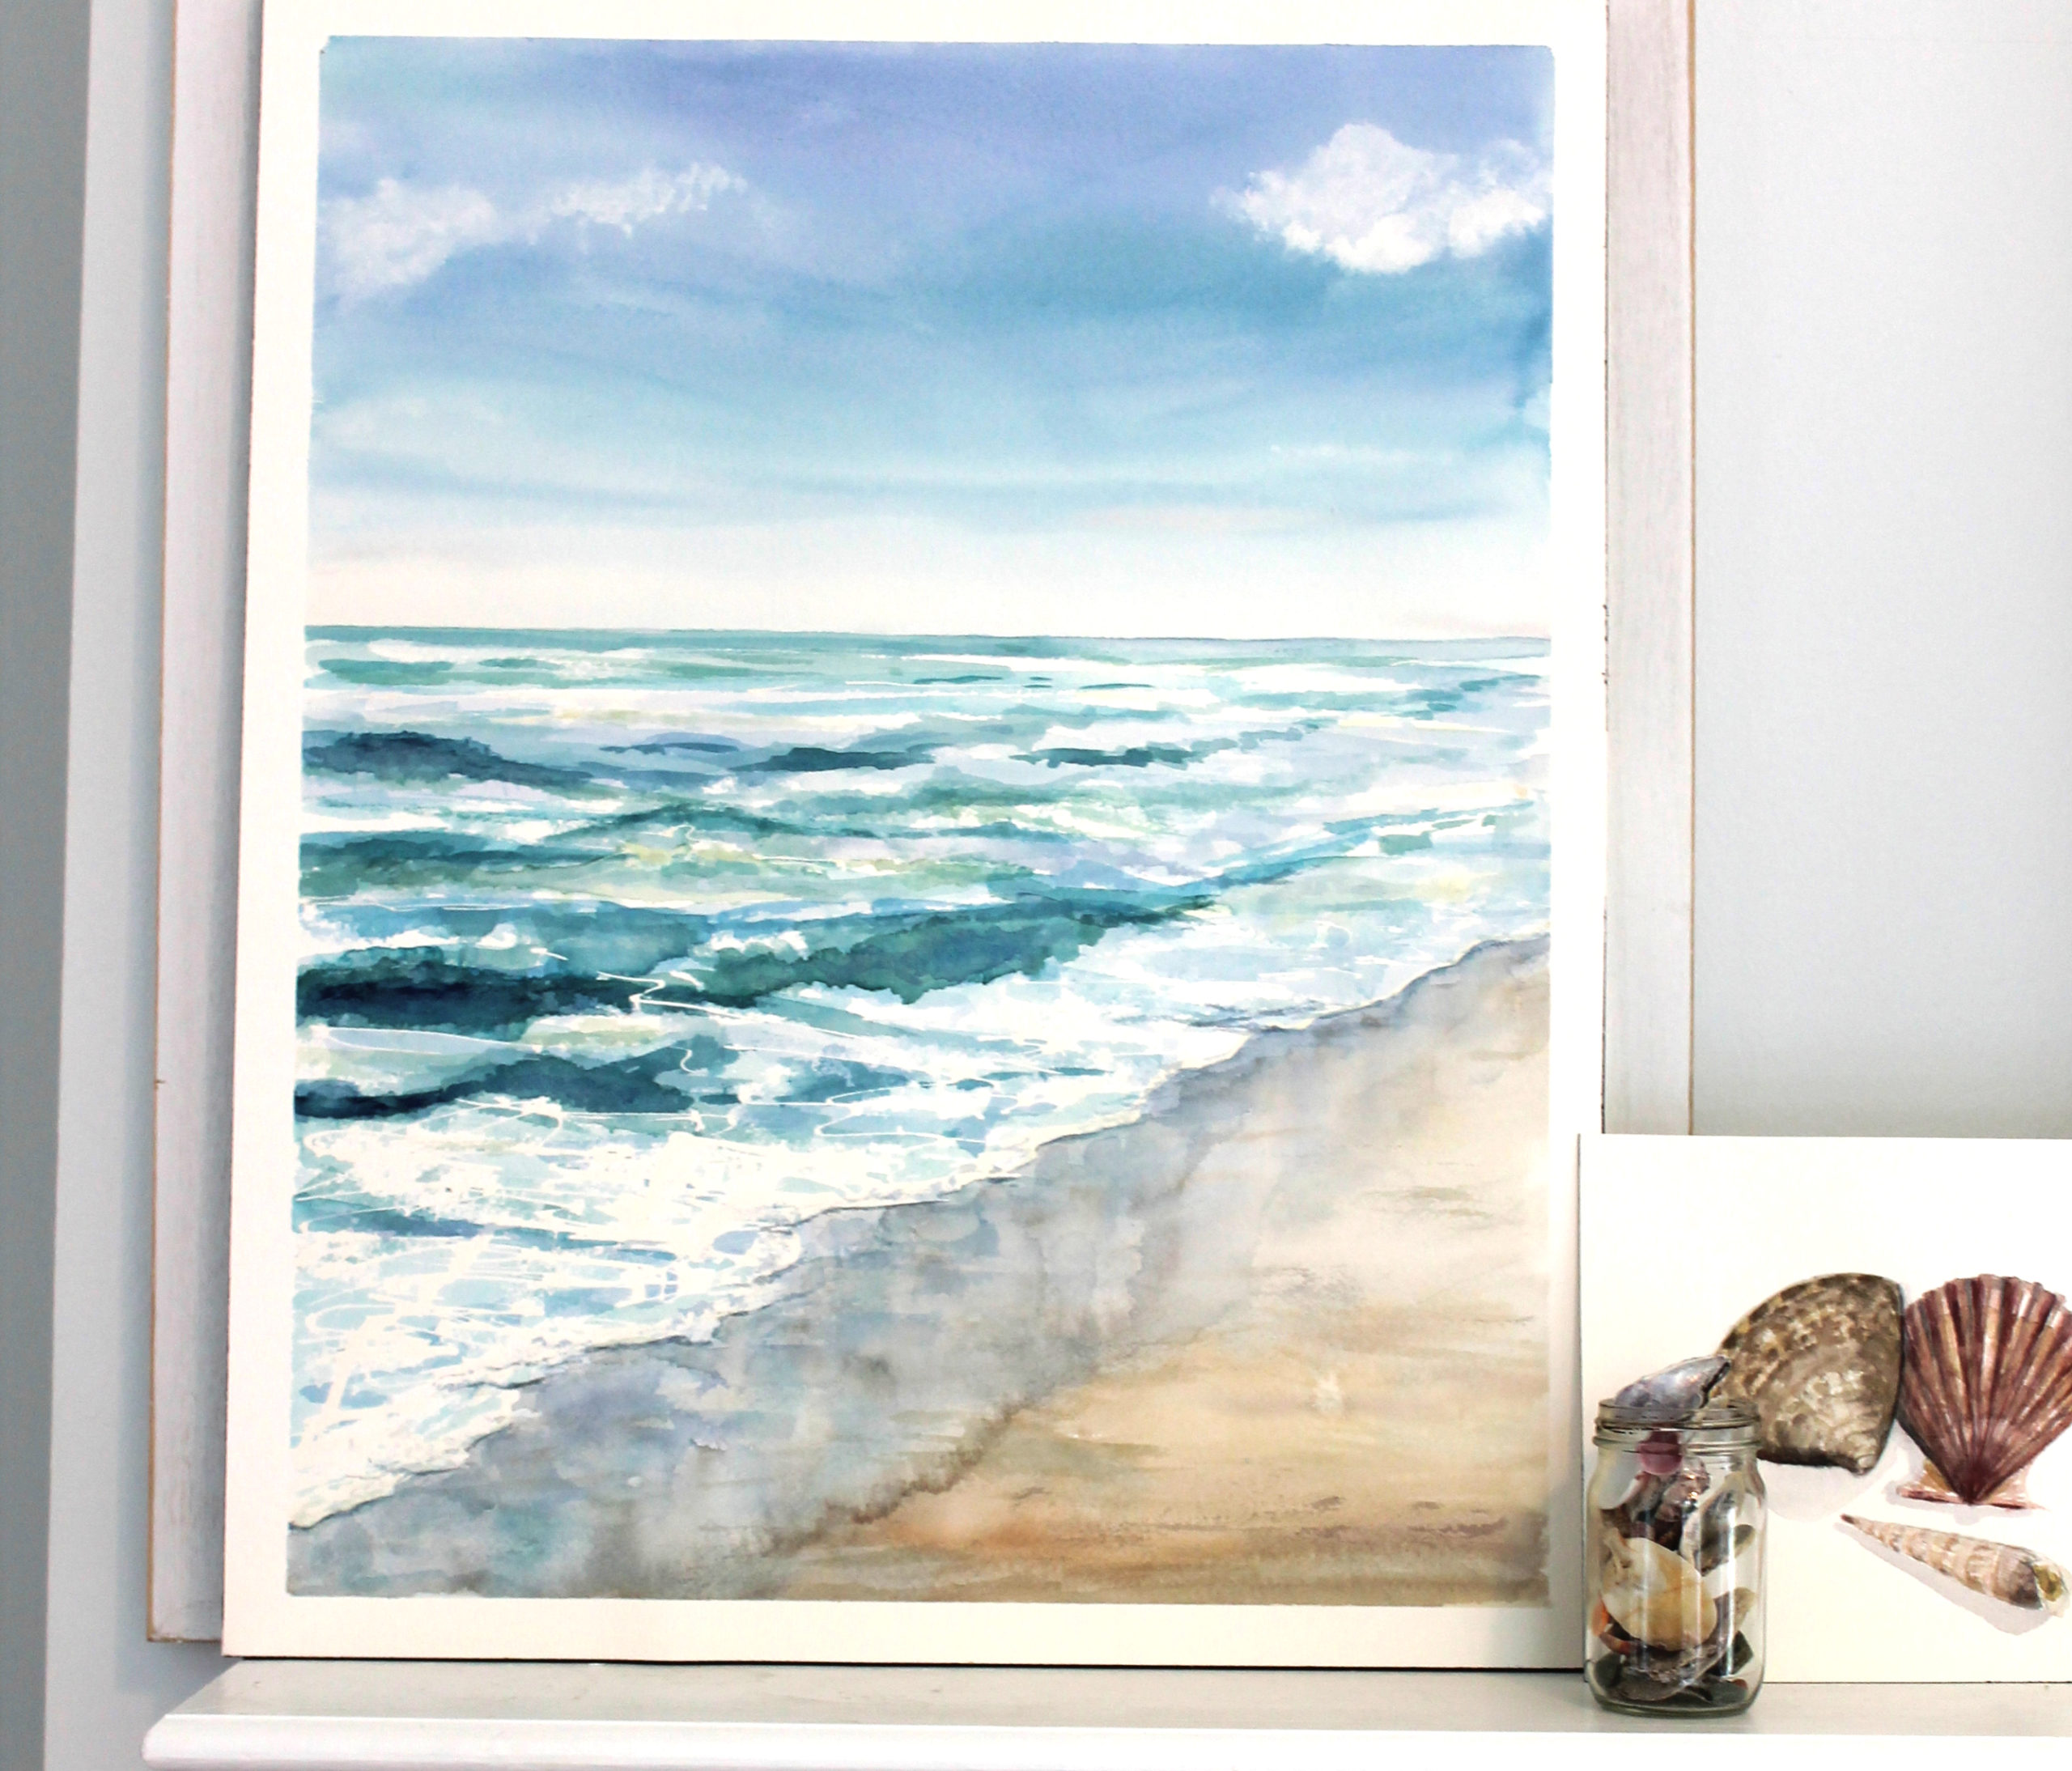
One of my attempts. This is a great tutorial, I learn something new each time!

And another! I like to paint the same scene with some tweaks!

I’m not sure why I have given my shop the cold shoulder. I haven’t had negative feed back, though I am always worried when there is no feedback.

Perhaps it is the medium itself that is the difficulty. Painting isn’t the problem, I have lots of paintings and only have a few listed on Etsy. It seems fake to sell prints even though the majority of art sold on Etsy is not original artwork. I am trying to teach myself some graphic design skills to transition into a more digital/repeatable artist. Maybe I don’t like that idea and that is why I am ignoring my Etsy shop.

Seth Godin is a great writer and pod caster. I recently listened to his episode about wabi sabi. The basic gist of wabi-sabi is that the imperfections are what makes us love something. The unique qualities impart an essence made more powerful because it is not repeatable. For me, the magic of creating a watercolor painting is the variability of your results. No two paintings are the same. The intersection and interaction of the pigments, paper and water create happy accidents.

Selling a print of a watercolor ruins the wabi-sabi. Or does it? If the image is moving and worth looking at, couldn’t more than one person possess it?

Clearly, I need to refine and define what exactly I am trying to do with my Etsy shop. I need to do something about all of these painting or I am going to end up on an episode of Hoarders.

Until I figure this out, I will continue to paint my happy river rocks, the perfect yet imperfect leaf, and to seek the most vibrant shade of green. For now, I will ignore the Etsy shop in the room.

Piles and piles

Hello world! It’s been a while. I have been running races and even had a PR in a 5k in April, a 24:27! At least I think it was a PR. I injured my psoas, which is just plain fun to say but not so fun to rehab in January. The psoas led to a hip flexor issue but I watched a million youtube videos and through a greater power and much stronger glutes, I have persevered!

If feel like my Altras contributed to my psoas pull/glute weakness. Though I love the zero drop, I felt like I had little arch support. As a runner with very high arches, I struggle to find a balance between restriction and support. I switched to Saucony Kinveras, which I liked for their light weight feel and support but after a few months, I began to get that familiar plantar plate ache, this time on the opposite foot. My plantar plate tear previously took me out of commission for about 2 months, I didn’t want to lose the best part of the spring/summer so I backed off and went back to my Hokas. I taped my 2nd toe down to prevent the curling I was starting to see and began a vigorous toe exercise regimen. I never thought my life would revolve around glute exercises and toe lifts, but, here I am.

After wearing the Hokas for a few weeks, the rocker bottom allowed me to take that strain off toes, I started looking for other options. I didn’t likt the narrow toe box on the Hokas, and I do feel the excessive stack height throws off my gait and doesn’t allow me to engage my now incredible glutes. I have never been as comfortable wearign a show as I was with the Altra Escalante but after a 10 mile race, and a very sore psoas, I checked into other zero or low drop shoes. I found the Topo Magnifly 3. These shoes are very comfortable, feel supportive but not bulky. Unlike the Altras, they don’t look like clown shoes. Not that there’s anything wrong with that…. I removed the insert and used these alleged zero drop insoles to allow for a little more shock control. I can’t believe I paid this much for an insert, but my toe has been ok so far!

Back to the black hole that is Etsy. It reminds me of the halcyon days of yore when I was first on facebook and I wanted to see every comment and like. Like this blog, I will go months without posting and then go on a rager. I didn’t paint as much during the pandemic as I thought I would when contemplating what I would do during a pandemic. My house was busy all of the time and I just didn’t make it a priority. Recently I started painting again, I don’t have a lot more wall space and I hate trying to make prints, so I just started throwing more stuff on Etsy. Some of the work is generally appealing and some is a little more artsy-fartsy. Either way, the posting process is cumbersome and I have no idea how to use Instagram but I made a page anyway. I don’t share it because I somehow want to be anonymous which makes no sense, pretty much the same thing I do with this blog. A quiet, dignified Etsy shop. That 2 people a week visit. I have actually had 7 sales which is more than I thought I would have but less than I would need to make this an actual occupation. I would have to figure out how to make prints and doo-dads with my prints on them and that makes me want to take a nap, though if I am following my own advice and learning new tricks, I guess I should learn. Here are the latest additions to my Etsy shop!