As a working mother who tries to run a few times a week, write in my blog and keep my family from starving or looking unacceptably dirty, my time is limited. I tend to paint in bursts, my least favorite part is figuring out what to paint and followed by how to frame my work. I still don’t have a good plan for how to frame them, I have a pile sitting in my workspace as I type.
One great way to be inspired is to watch a YouTube tutorial. I have mentioned some of the artists I subscribe to here.
Many of my painting are water scenes painted from my own photographs. As a life-long student, I love to watch and learn from other artists including how they paint water. Often times I will just watch the video and not even paint. I have painted this Grant Fuller tutorial a few times and think he gives great tips about painting wet sand and creating the a “water’s edge.”
Overview of the tutorial
Do a quick pencil sketch, I pause the opening frame of the video and draw my sketch. The pencil lines won’t show in the final painting but try to keep them out of the sky!
Wet the horizon and sky blending into the distant tree line is fine as we will be going over it with a darker pigment.
I didn’t have cadmium orange but used gold ochre to create the distant light on the horizon. The use of cobalt blue and the gold ochre creates an interesting grey/blue that I wouldn’t have come up with on my own. I tend to use ultramarine or windsor blue in my skies and have started to use cobalt more to create some nice colors without the granulation that comes from the ultramarine.
Let the sky dry. If you don’t you will get bleed. Sometimes we want bleed, in this case we do not.
For the background, I used a cobalt blue, yellow ochre with a touch of burnt sienna. You want this layer to look misty so don’t put it on too dark.
The whites are so important when you are painting waves, you can always go back and add more “water” but it’s much more difficult to get back to white! The thin layer of white against the distant shore is essential.
Burnt sienna and ultramarine for the rocks
When using the UM and BS on the water’s edge, go easy! Leave some gaps, better to add more than to have dark globs. Light touch is the key here. This step is what really makes the water “pop” and gives depth to the painting.
Let everything dry and then wet the entire bottom portion of the paper, use the ultramarine and burnt sienna again to make a gradient in the wet paper, more blue at the water’s edge and more brown towards the drier sand at the bottom.
Use a clean brush to create breaks in the sand adding reflective elements and giving the sand a “wet” appearance.
One of my attempts. This is a great tutorial, I learn something new each time!
And another! I like to paint the same scene with some tweaks!
Using some of the techniques! Wet sand and water’s edge.
Last summer we took a family trip to to celebrate our 20th wedding anniversary. We knew we wanted to end up in Omaha (don’t judge) and based on my Southwest Airlines points, decided to begin our trip in Colorado.
We drove from Denver to Cheyenne, narrowly missing the Frontier Days celebration for which the town is famous. A highlight of our Cheyenne visit was touring the state house. We even saw some rodeo champions taking photos on the steps!
The Wyoming state capital dome
Scottsbluff National Monument, gateway to the West
Our next stop was Scottsbluff National Monument in Nebraska. I went to graduate school in Nebraska and had always wanted to visit Scottsbluff. Since Omaha is nearly 7 hours away it just never happened. Fast forward 20 years and we decided to take a detour to Scottsbluff. If you can, you should too!
Oregon Trail
The grassland stretches out like an ocean. We arrived at dusk and the sun setting in the west was like something out of a movie. I have ancestors who traveled the Oregon Trail during the westward migration and seeing the trail extending towards the horizon moved me. The signs warning of rattlesnakes were a reminder of how brave these pioneers were.
We stayed at a really interesting hotel in nearby Gering, Nebraska. There isn’t too much nearby and you could probably do the Scottbluff museum and hike and move on but we arrived later in the day and opted to hike first thing, before the heat set in. As an aside, we visited at the end of July, during a heat wave. Coming from Virginia, it didn’t seem that bad to us as the humidity was very low. We did make sure to have a lot of water with us both in the car and while we were hiking. It is easy to get dehydrated, especially when you are used to high humidity.
The hike to the top of the bluff is fairly steep (though paved and easy to navigate) and very scenic. The Saddle rock trail leads from behind the visitor’s center to the top of the bluff. Once you reach the top, there is another loop round where you can see the changing topography from east to west. I thought this was a great hike, especially if you get out early and get to see the sunrise!
starting up the trailView from the top
South Dakota- Rankin Ridge Trail
Since we already hiked the Scottsbluff trail and we were heading to Custer State Park for the evening, we opted to stop for a short hike along the way. We used the restrooms at Wind Cave National Park and continued on to the Rankin Ridge trail. A storm was rolling in and the 1 mile loop seemed perfect for the time allowed. After the very dry and nearly tree-less hike in Nebaska that morning, it was cool (both literally and figuratively) to see the ponderosa pine and green hills on the South Dakota trail. Easy to follow and well-marked, the Rankin Ridge trail highlights an old fire tower at the top. The views are specatacular and we even got to see lightening as we scurried past the tower!
Where to stay in Custer State Park?
I don’t plan my trips years in advance. Sometimes they are only planned a few weeks in advance. I am sure that more organized people can give better advice about where to stay on vacation. We cobbled together one night stays in 3 different parts of the park and I actually think it gave us a unique experience and allowed for better exploration of the park. Perhaps this is an excuse to make up for my lack of pre-planning but it worked for us!
Blue Bell Lodge
We spent our first night in a cabin at Blue Bell Lodge. I always buy food before I enter into these large parks so that I am not hostage to the long lines and overpriced food. There was a small kitchen the a stove top, tiny fridge and a sink. We made pasta and had cereal in the morning. I have a collapsible cooler (bought from Costco) and bought a freezer pack at Walmart when we landed.
The cabin was nice, I lucked out and had a pretty private site, some of the other cabins were close together. I like my privacy and this cabin had a nice view from the porch
Driving the Wildlife Loop at Custer State Park
There a few highlight on this trip and driving the Wildlife Loop at dusk was one of them. As mentioned earlier, there were some strong storms that went the the area just after our hike. We drove up to the cabin and unloaded and after the storm, we went for a drive. I had read that the WIldlife Loop can be very crowded during the day and that much of the wildlife isn’t actually out during the day. The storm cleared out the crowds and we had much of this beautiful drive to ourselves. Then it was us and the Bison!
Wildlife Loop at Dusknot a wildlife photographer
Mount Rushmore was not the highlight of the trip
Let me begin by saying that I don’t like crowds. I like to hike and I like to see things. I don’t like to hike to see crowds. While Mount Rushmore is cool to see, you can pretty much see it from the road. There were so many bus loads of people it was hard to fathom where they all came from , especially after our scenic and quiet drive through the bison herds the night before. If you are intent on ticking Mount Rushmore off of your list, go early to beat the crowds. I don’t know what I was expecting, but this wasn’t it. There are so many beautiful places nearby, don’t spend too much time on this stop!
Seriously, you can see it from the road.
Custer State Park Hikes- Lover’s Leap Trail
Lover’s Leap was a nice trail, around a 4 mile loop. When we hiked it last year, the 2nd half of the loop, going clockwise, was pretty overgrown and there was a lot of poison ivy. If I were to do this hike again, I would do it as an out and back from Lover’s Leap. Or wear pants. As mentioned, we were there during a heat wave so we were wearing shorts.
The State Game Lodge was our least favorite place to stay in Custer State Park
Perhaps these rooms have been updated since we stayed. The check in was unfriendly at best. The room is very basic, considering the cost and was definitely a disappointment compared to our other accommodations. If you have no other option, then this is a perfectly adequate room, it was just a little musty and tired and quite noisy if you are on the ground floor.
A tad claustrophobic.
Needles Highway, Black Hills Driving
My husband was very excited to drive the Needles highway. The tunnels and turns are terrifying. The landscape is so wild that it looks like you are on the moon. This is a must-do but be careful, the roads are narrow and people are stopping all of the time. Here is a video of us driving through the “needles eye!”
If you only have time to do one hike in South Dakota make it the Black Elk Peak
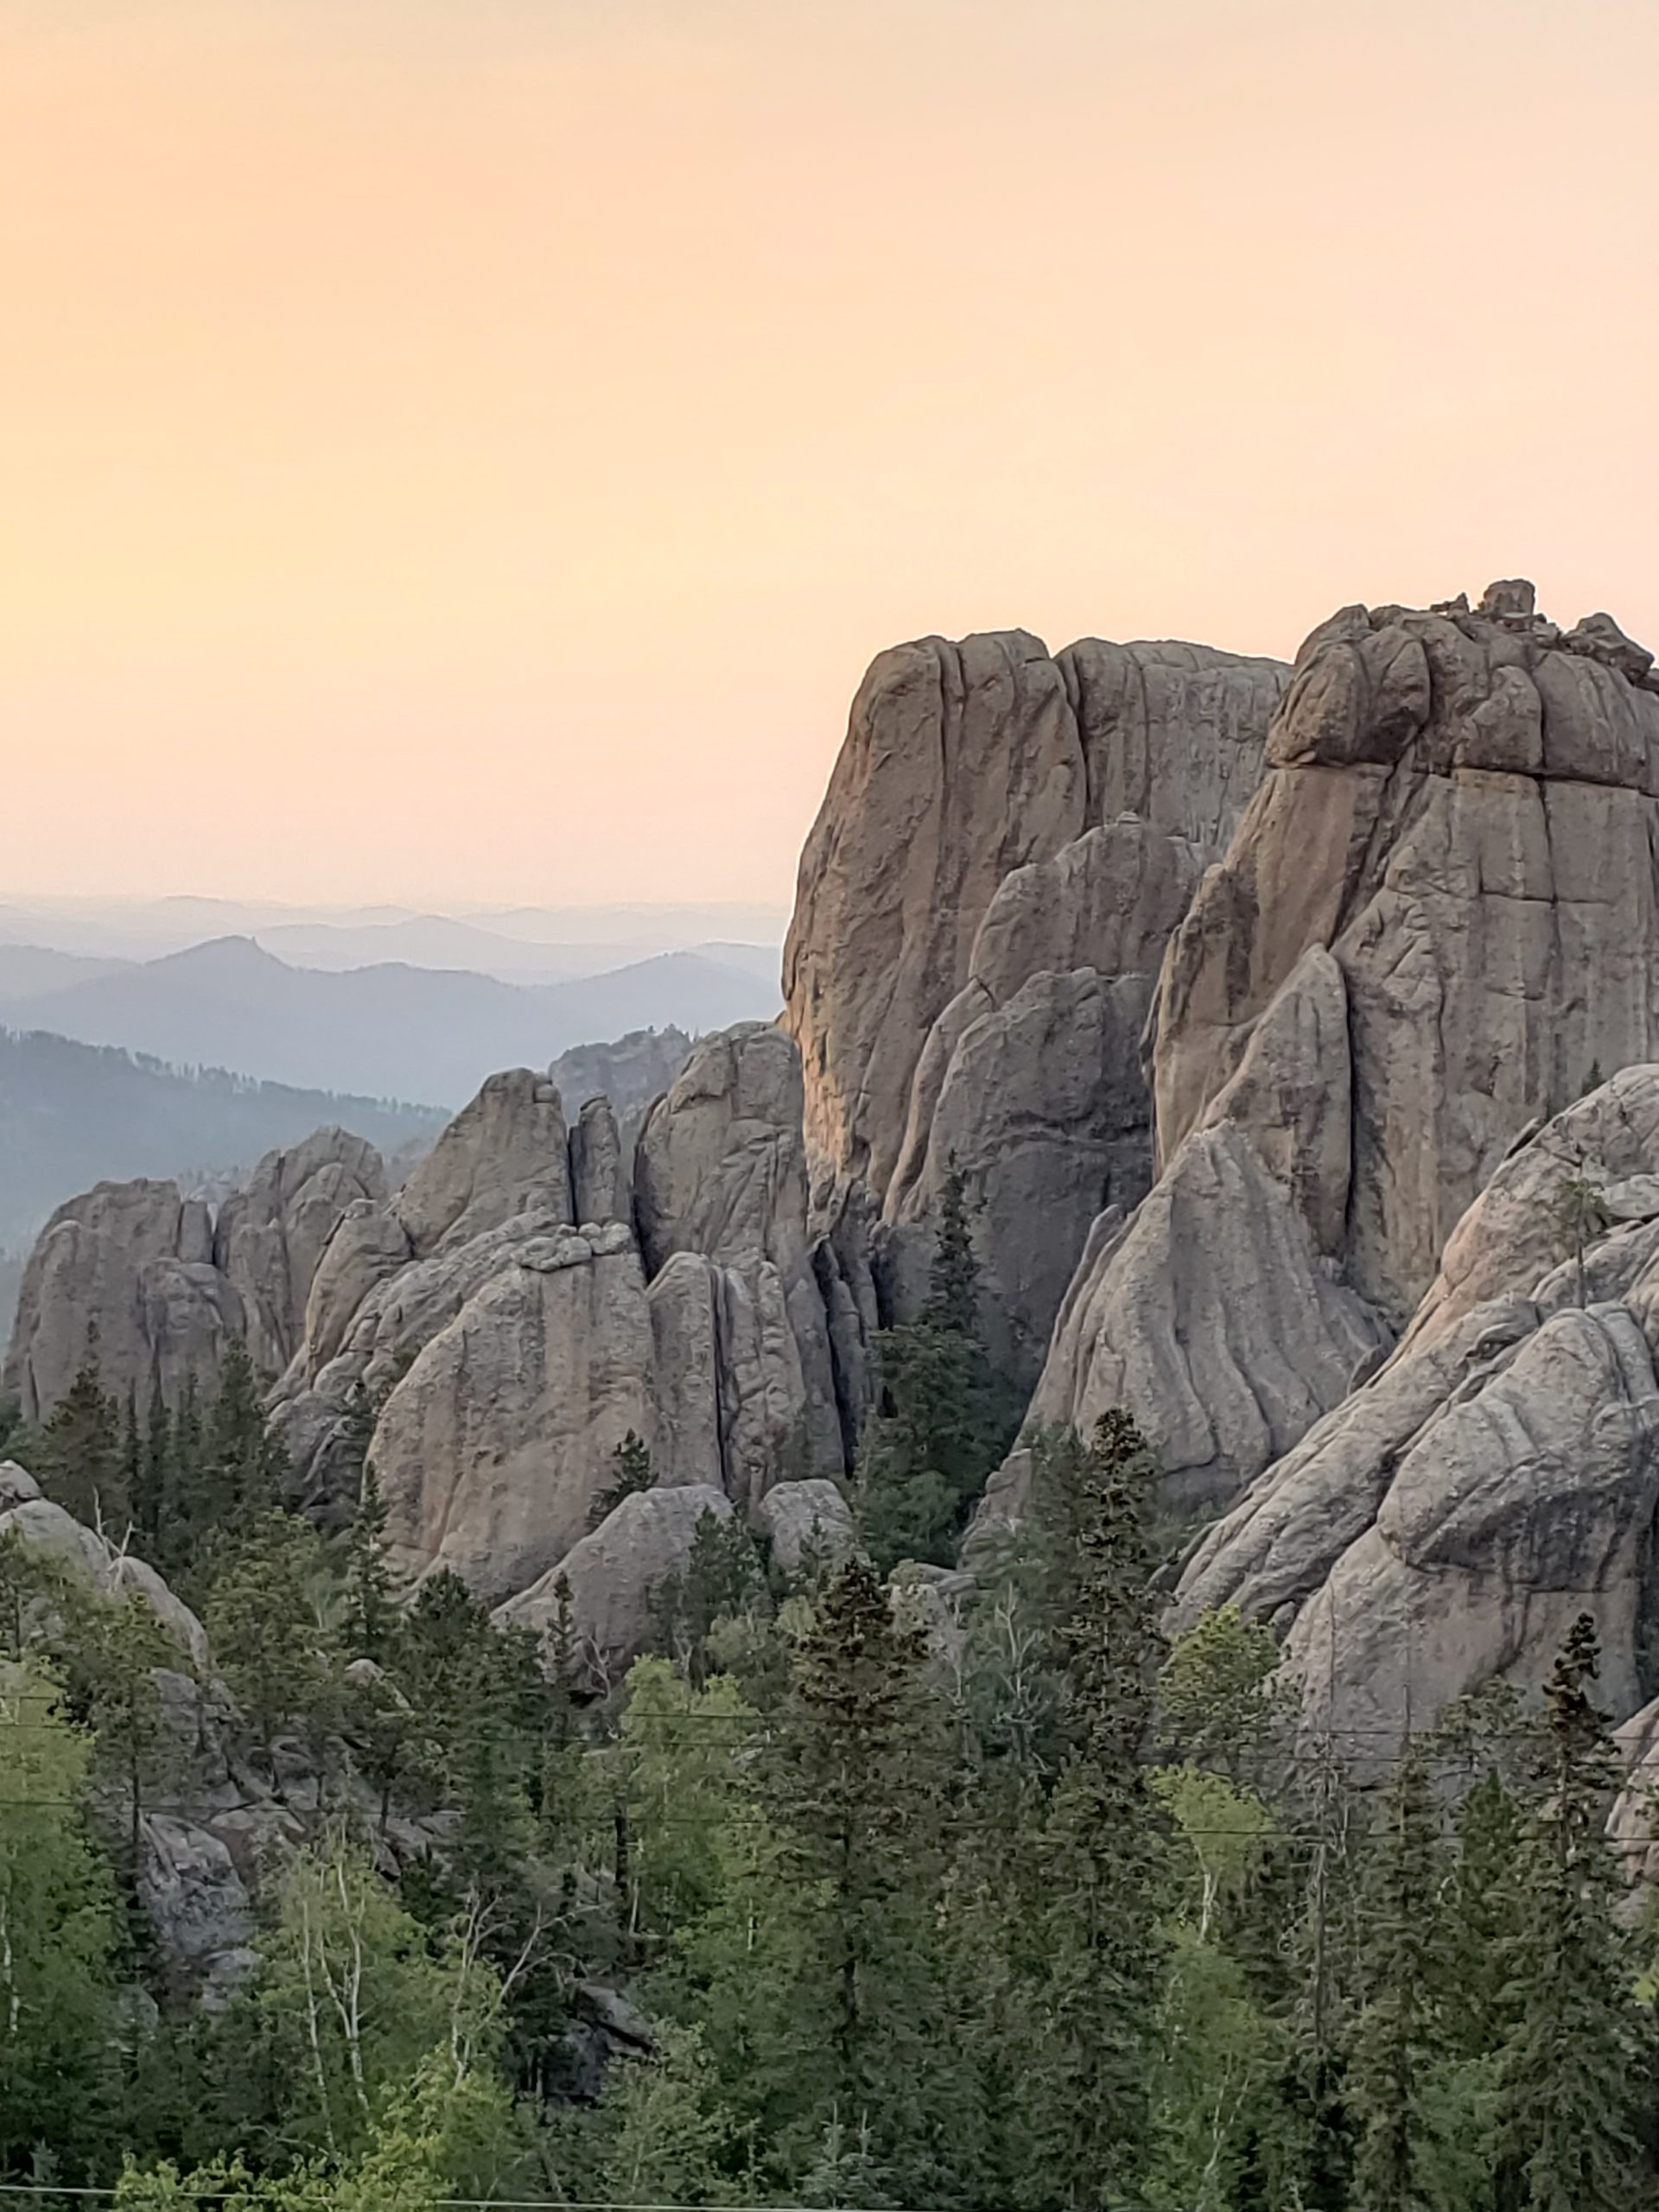
We love to hike, we aren’t “mountaineers” or huge risk takers but I always enjoy seeing something new. The mountains of South Dakota are very interesting, they looks like drip castles. Despite the heat, we enjoyed this hike, definitely a trip highlight! Make sure you bring plenty of water because you are hiking the highest point east of the Rockies!
There are many different trails to get to the tower at Black Elk Peak. We took trial #9 from behind the Sylvan Lake and returned back on #4, taking the detours to Cathedral Spires and Little Devil’s Tower. Little Devil’s Tower has very steep rocks and I found it a little scary to climb.
The summit of Black Elk Peak is spectacular, find a flat spot and grab a seat. Take a well deserved rest and enjoy the scenery!
Sylvan Lake Lodge, a room with a view
There is an acutal lodge here but we stayed in one of the studio cabins. Though small, the spectacular scenery makes this a worthwhile place to stay. There is a small fridge and a microwave. You can walk to the lake, we ran the loop trail around the lake. There is easy access to the Black Elk Peak trail from the lake. The view from this cabin made up for the lack of space. Parking is tight, we pulled in right next to the picnic table.
Staying in three different areas of Custer State Park allowed us to explore without back tracking. The Blue Bell Lodge gave us good access to some of the lower trails of the park as well as the Wildlife Loop. Sylvan Lake is close to Needles Highway and to Black Elk Peak. Custer is a cute little town with quite a few restaurants, Keystone is very touristy but we liked Hill City. There is a fantastic German restaurant in the quaint downtown of Hill City called the Alpine Inn. We had a great lunch there, it is very popular. We arrived just as they opened for lunch and there was quite a wait by the time we left!
I took these photos from the back of the Sylvan Lake Lodge at sunset, it was magical! South Dakota is a unique place to hike and explore!
This was the first half of our adventure. Road trips are great becasue you can pack all kind sof stuff in your car. But what do you do when you are flying to another destination to take your road trip? Here are some tips for a successful road trip, especially when you are flying to your destination!
How to pack for a road trip when you are renting a car at your destination
Bring water bottles or buy them when you land, insulated are a must in warm weather
Buy a lot of water, keep gallons in the trunk, refill you bottles as needed, I also buy some smaller bottles to bring as extra water for hikes. They are also great to freeze when you have that option in a hotel, this allows you to keep cold things cold and then you have cold water to drink!
When you land, have a list of things to buy at your favorite superstore, make this ahead of time so you don’t panic shop and forget crucial items. For example, I buy sunscreen, bug spray, hand wipes, chlorox wipes, pepper spray and cheap towels (they are great to sit on and you never know when you might need them!)
At the superstore, buy your non perishable food items, granola bars, nuts, tuna (with a pull tab.) I like to buy lemons to make tuna salad and a small container of olive oil and vinegar to make dressing. I also buy paper towels, ziplock bags, plastic silverware (can be rewashed), paper plates and bowls. Cereal, peanut butter, jelly and bread will get you through a lot of meals I also buy a refreeze-able cold pack or two. Apples and clementines are great to have in the car.
I bring a small collapsible cooler on the plane and then buy cold items as needed, a sealed pack of deli meat, lettuce and small container of milk can be kept cold and brought from one hotel to another.
I am a light sleeper, I never know what the bed situation will look like from place to place so I bring this camping air mattress with with me. This bed is currently listed as out of stock but there are many other like this to choose from. I like that it has an integral hand pump, this allows for easy inflation without electricity. I also bring a sleeping bag liner as a compact way to have an extra set of sheets! This is a narrow bed and can fit into almost any hotel room. If someone needs their own bed, this is an easy solution!
Eye masks and ear plugs help everyone get a better night sleep!
Next up, skip the lines and head to Nebraska for your authentic ranch experience!
This weekend I ran in a race that proclaims that it is the 14th largest race in the United States. I’m hazy on the details of how they know year to year how large a race will be but in this case, it felt like the 14th largest race in the country.
There were 640 women in my age bracket!
Yes, in a 5 year age bracket. I didn’t win my age group. Though according to my math loving husband, my 34th pace finish was almost in the top 5%! There were so many people passing me, I was surprised there was anyone left behind me!
What I did wrong
I went out way too fast. I had not been training for faster than a 9 min mile pace for 6 miles and I wanted to be at 8:30 on race day. I was too fast for the first 2 miles, around an 8:10 to 8:15 and too slow in mile 4, over a 9 min. My average was around 8:45 but I think if I had started at the 8:30, I might have had a better chance of staying there.
It’s hard to “run your race”when there are 14,000 people around you, I really wanted to match my seed thime of 53-55. I managed to stay under but I think a more consistent run would have been better for me psychologicaly.
I shouldn’t have used ear buds or listened to music. This race is known for having a “Block Party” feel. There are bands on every corner and porch parties the entire way. I had my music turned down so I could hear if someone yelled “get out of the way!” or “runaway bus!” I didn’t really get into my own music due to the ambient noise. I didn’t really get into the live music or the party atmosphere because of my earbuds. I would have been better off leaving the music at home and enjoying the race.
I was nervous about being in a large crowd and it affected my sleep. I am a little paranoid and the though of a violent or random attack was in the back of my mind. I don’t know how much you can change the way you are wired. Large races like this one, might not be for me!
What I did right
I pushed hard and didn’t quit. Until the finish line, then I felt like I would throw up for a minute. I am a lazy runner. I don’t like pain. I had a cramp around mile 4 and actually stopped for a few seconds, touched my toes and then pressed on! After this, I got back on pace and finished to the best of my training.
I paid for parking earlier in the week. Not knowing the course and worried about navigating the “big city” on race morning, I did something I wouldn’t normally do. I paid for parking. In advance. I reserved a spot quite close to the start/finish line and it made the morning much easier. We even walked back before the start to put our sweatshirts in the car.
We arranged a meeting spot. Finding a single person out of 20,000 people in hard. Planning a meeting spot is easy. Do it the easy way. We were not running with our phones and made sure we had a meeting spot so one of us didn’t have to walk home.
I stepped out of my comfort zone and tried a new race, in a new city. This is what I love about running. Running is a great way to explore new places. I find that when I do too many of our local races, I lose this sense of freedom and exploration. One of my goals is to try new races in new places!
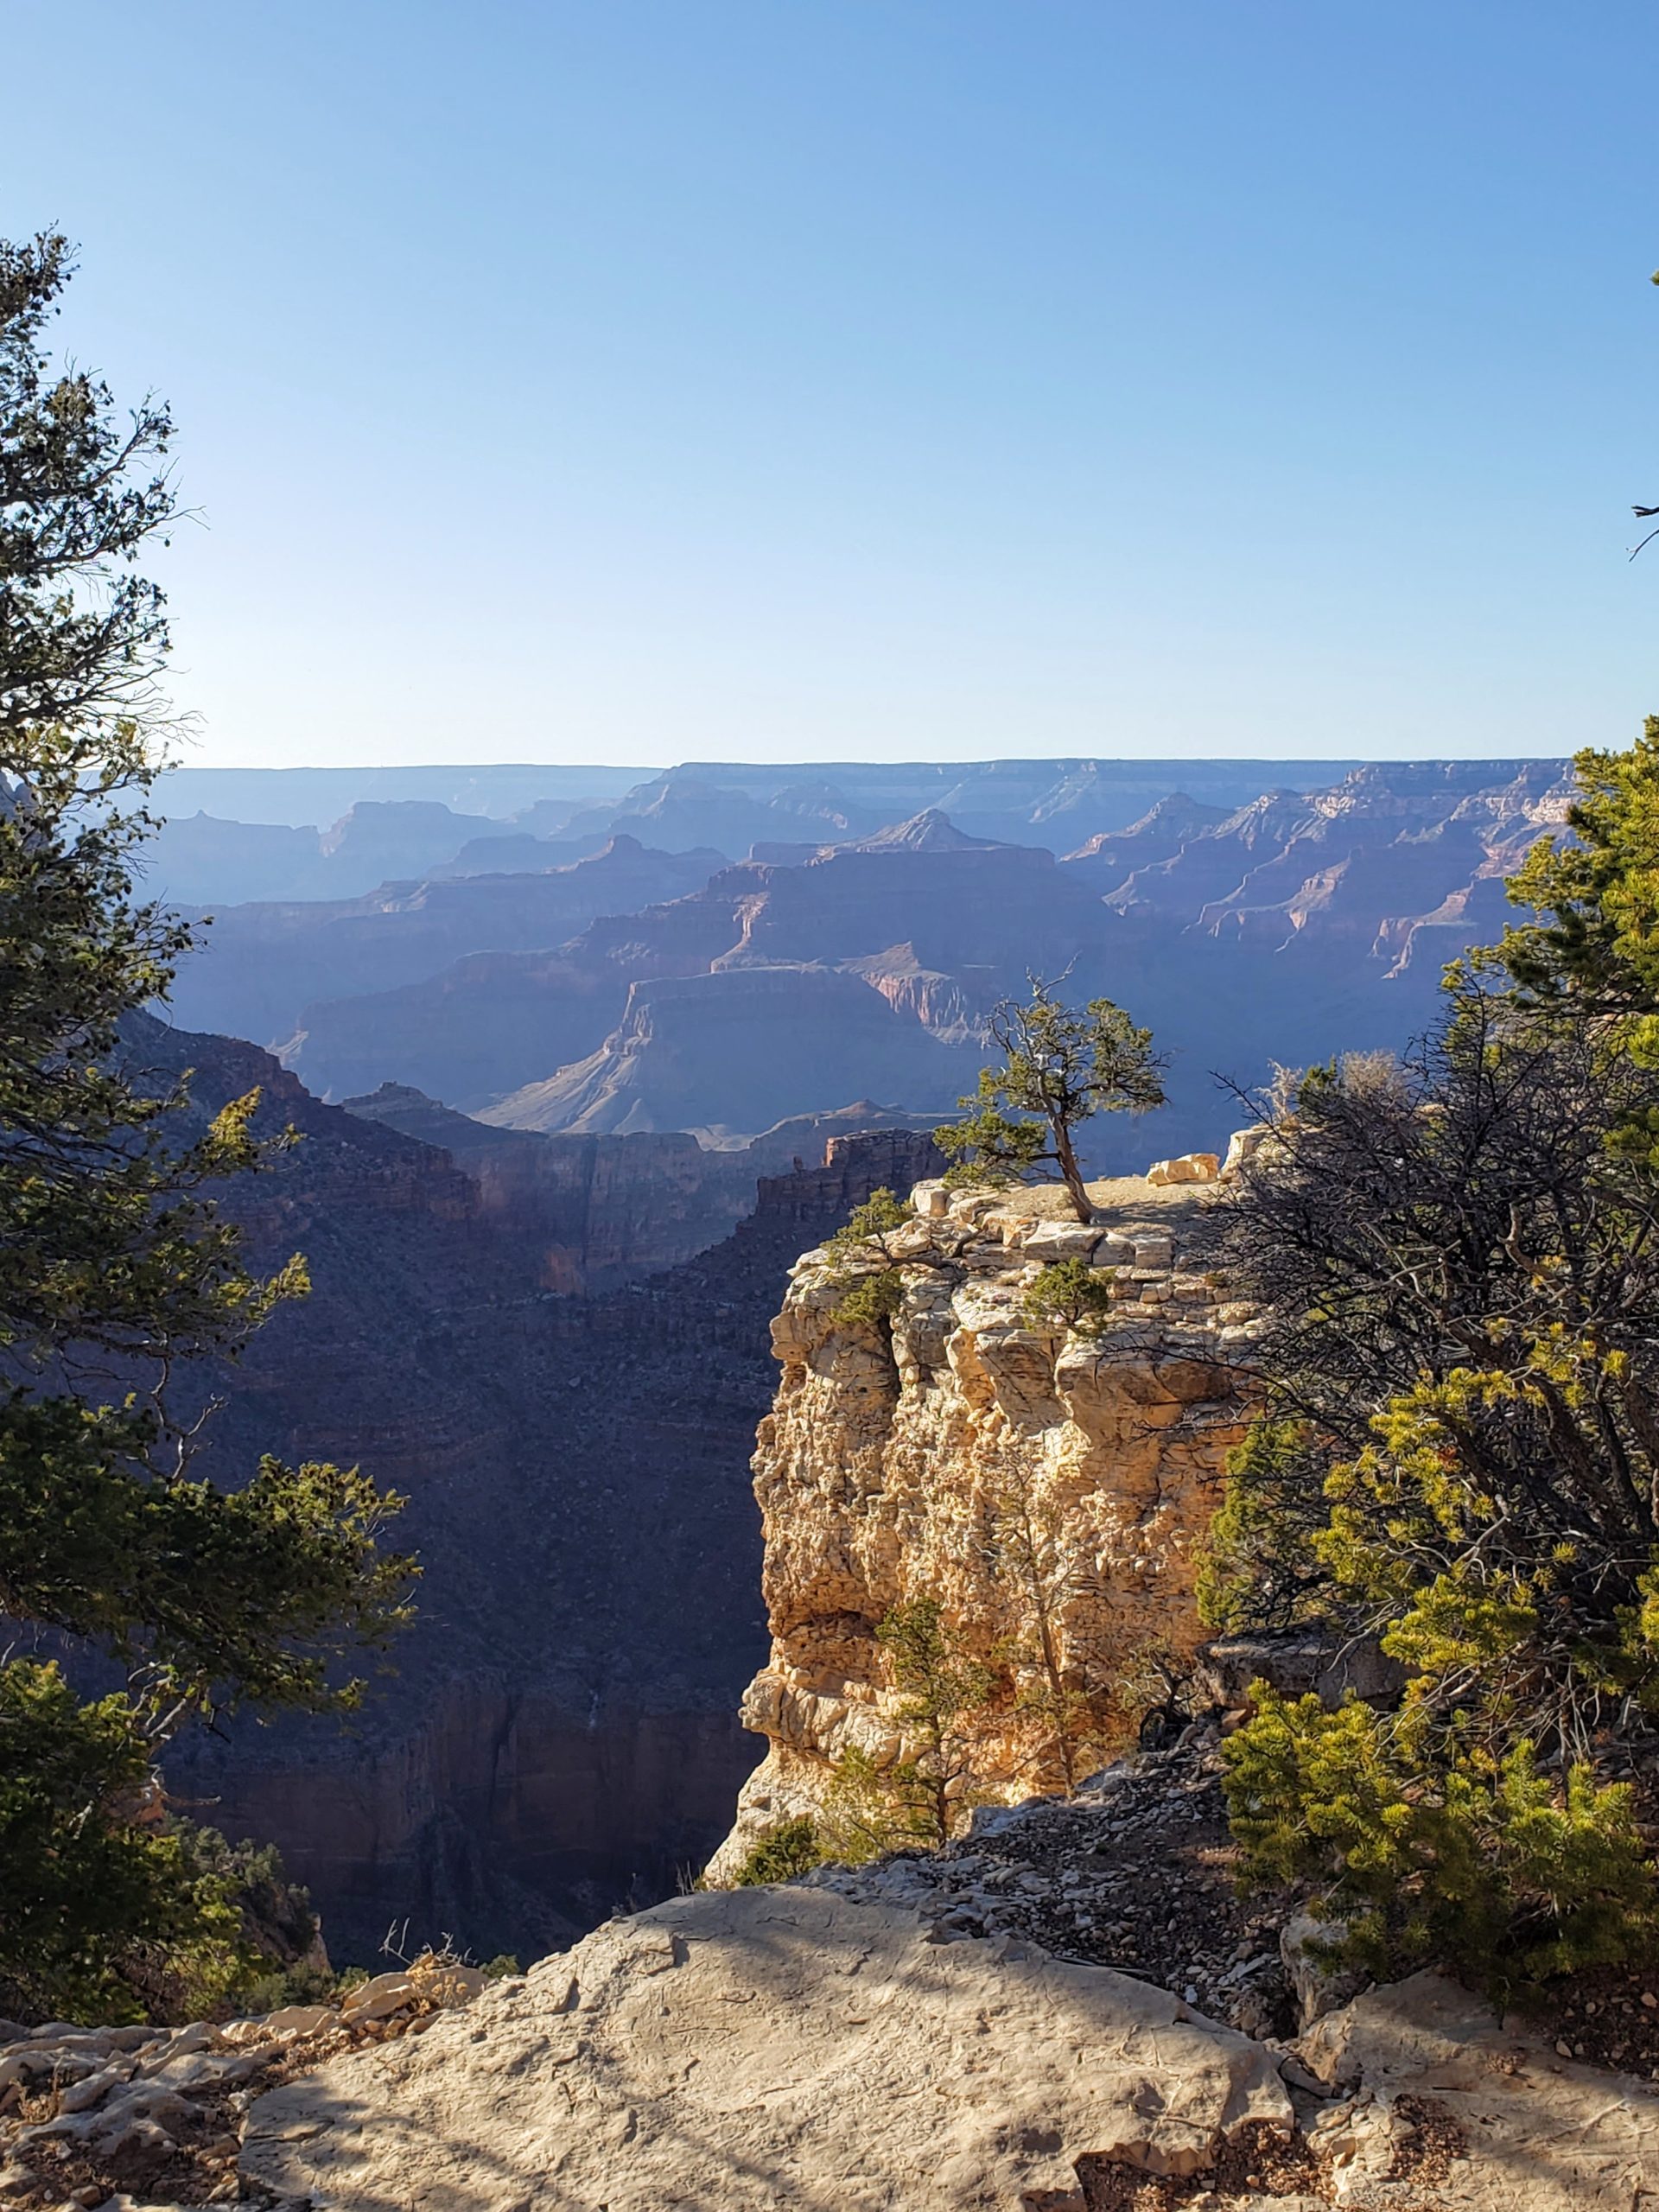
Just kidding, I have so much more to say! I knew the Grand Canyon would be vast, some might even say “grand,” but I wasn’t prepared for the spectacular beauty. The immensity viewed in panorama is truly an awe-inspiring experience.
After a disappointing visit to Mount Rushmore last year (but a great trip to Custer State Park and Fort Robinson!) I was afraid that the Grand Canyon would be touristy. There were tourists, though not nearly the number I had envisioned. Most were silently awestruck as well. I have no idea what it is like to visit in the summer, but in early April, it was magical.
We also visited Sedona and had some great hikes there, I plan to blog about this in a separate post. Having spent the majority of my life on the east coast with a little under a decade of mid-west sprinkled in, I am not familiar with the desert landscape.
Even seeing cacti (or cactuses as I like to say) in the desert was thrilling for us! As we drove from Sedona into Flagstaff, I was shocked to see snow! I knew there were mountain but didn’t realize how tall the San Francisco peaks are!
The beautiful and tasty Pavlova at the Cornish Pasty Co.
We had dessert in at the Cornish Pastry Co. It was pretty empty but I can imagine that during their busy ski season, this place would be packed. I used dessert and desert in the same paragraph!
We opted to stay inside the park
Several times I almost shortened our stay at the Grand Canyon. Was it really necessary to spend 2 nights there? Could I justify the expense of staying two nights in what was essentially a “motel” room for $350+ a night? While in Sedona I came close to cancelling our second night at the Kachina Lodge. I’m glad that I stuck to our plan. Though I recognize that financially, this might not be a feasible option for many people, it was worth it to me.
Our room was a “partial canyon view.” We were on the 2nd floor of the Kachina Lodge.
How do you choose where to stay in the Grand Canyon?
I did not book this trip years in advance. I knew it was difficult to score a room within the park. I used the main page and kept checking daily for open nights. When I spotted two nights in a row in the Kachina Lodge for the week I hoped to visit, I pretty much planned the rest of my trip around that! I did not do much research about the lodge but had low expectations, especially after our Custer State Park Lodge experience (there were some good and some not so good places to stay.)
When I checked in at the next-door El Tovar hotel, I was pleasantly surprised by how charming it was. It was rustic but clean and the people were very helpful. I was originally given a room on the first floor. As a very light sleeper, I have learned that a top floor is usually my best option. Sheepishly I asked if he had a top floor room available. After a few minutes of checking back and forth, I was presented a key for a room on the 2nd of the two floor lodge. Though the lodge itself is older, the remodel has given it more of a “mission-style” lodge feel which seemed appropriate to the surroundings. The spacious room included a good sized refrigerator and cabinet area. There are no microwaves but there is a coffee pot with coffe packets provided. Having known ahead of time about the lack of microwave, Istocked up in Flagstaff at the Target. We bought the basics; cereal, milk, bread, lettuce, lunch meat, peanut butter, apples and other snacks. Preparing in this way allowed us to hike early in the morning without having to find breakfast. We also skipped the pricey food, though we had burgers one afternoon. They were ok, the service was overwhelmed and food was very slow to come out.
The Kachina and Thunderbird Lodges are situated right on the boardwalk overlooking the Grand Canyon. The El Tovar Hotel is considered the nicest of the places to stay inside the park and the rooms should have views to match. I would say that the Kachina actually has better views than the Thunderbird because it seems to be slightly higher on the hill but either way, you can’t go wrong. Especially if you are able to spring for a room with a view!
There isn’t much I can write to do justice to the emotions I felt when I first saw the Grand Canyon. It’s big. So big. For the first hour, I felt dizzy every time I looked at it. It’s like putting on a virtual reality headset where it looks real but your mind can’t make sense of what you are seeing. When we arrived, it was nearing sunset and we walked on the rim trail, taking in the changing landscape. Every cliff, gorge, rock and ravine comes alive and changes in the light. It was quiet. By 5pm there were only a handful of people walking. It was cold, temperatures dropped rapidly from the low 60’s to the 40’s.
By staying in the park we were able to walk at sunset and sunrise with very few people around. If you are able to make it happen, stay in the park, even if it is only for a night. We did an incredible and long hike down the Angel’s Rest trail. More on that later!
I can think of two times in my life where this advice really should have been followed. The first time was on a cruise. My second and as of now, my last cruise. We took this particular cruise in early November. Though technically considered “hurricane season,” November is not usually prime time for major storms. It was a short cruise, only 3 nights. They seemed to last forever. It was the first time we went away alone after our second child was born.
Did you know that cruise ship have stabilizers that emerge from the side of the ship? I was blissfully unaware of these stabilizing fins. Did I mention that we were traveling at the tail end of hurricane season? Long story short, we sailed through a tropical storm, the waves were so big that all dining rooms were closed, all shows were cancelled and it we never left the ship as it was too dangerous to pull into any ports. We were stuck in our room, flopping back and forth feeling pretty miserable. The bathroom, similar in size to an airplane bathroom (yet somehow defying the laws of physics and fitting a shower into the same space) had a latch securing the door on the outside, allowing it to remain open. I didn’t think much of this latch until we were pitching and rolling, attempting to use the bathroom, undoing the latch and then SLAM went the door on my husband’s finger. We should have left that hatch battened down.
In the search for ice to place on his finger, my husband ran into the a nice woman on the elevator who told him that she was the captain’s wife and that he would not let the ship sink if she was on it. This news didn’t reassure me as much as I think she intended it to. I would hope the captain wouldn’t let the ship sink even if wasn’t his personal Love Boat. We survived, which bring us to many years later…
The second time I should have “battened down the hatches,” would have been the last time we left the farm. I’m not sure at which point in the farm journey that we unlatched the barn boor. I am not speaking metaphorically of an unzipped fly, that would have been much easier to fix. The double, heavy, barn door was shut, the wood was pretty warped and it seemed to be a secure fit, at some point the padlock was removed. I had brought a new lock with us, but somehow in all of the popcorn ceiling excitement, we never put it on the barn latch.
We drove up to the farm this past weekend, after nearly a month since our last visit. When we pulled up the steep hill towards the house the first thing we saw was a wide open barn door. One of the two doors was laying on the ground. My first thought was, “vandals!” My second thought was, “how on earth are we going to get this door off the ground?” The door is very large and it had been ripped clean off of the hinges. After further investigation of the barn, we realized that this was not likely the work of vandals. We should have battened the hatches.
One of the things I love about the farm is the constant breeze. In the summer, I am sure I will find the constant breeze refreshing. In this particular case, high winds are the most likely culprit for our downed door. With the external latch unfastened, the winds blew the door to and fro. The door banged against the side of the building until it was knocked off of the hinges, splintering the wood frame in the process.
exhibit A, B and C
I didn’t get any pictures of the ordeal. I was too stunned when we drove up and then we immediately sprang into action mode. We tilted the door back into position, my husband was able to shimmy it into place enough that we could fasten not only the outer latch but the TWO interior latches that we had not bothered with earlier. I am not sure how we will fix this in the long run, that’s a pretty big door jamb to replace! Lesson learned. I will likely write all about it in a riveting tale of “Reframing the Barn Door, Mind Over Matter. In the meantime, I will batten down the hatches.
If you are a smoker and you live in a house with a popcorn ceiling, you should do two things. First, you should quit smoking because it is really, really bad for you. After you quit smoking, you should remove your popcorn ceiling because it is really, really absorbent.
I have at times, regretted buying this house. This is not surprising as I am an over analyzing yet impulsive person. Not always a good combination but it makes for an interesting life. I really dislike the smell of smoke. Having grown up with a heavy smoker, I have legitimate cancer concerns. I didn’t realize how much “3rd hand” smoke there was in the house, finding the musty odor to be dominant at the time. We are trying to remove or seal as much as we can. Studies have shown that you can’t clean out the toxic agents, removing and repainting is pretty much the only way to get rid of the potential carcinogens. After we get the dusty part done, we will remove and replace the duct work. Right now, we are changing to the most powerful filters we can find. To learn more about 3rd hand smoke and give yourself more things to worry about in this otherwise relaxing world, the Cleveland Clinic has a good article here. When we first pulled up the carpets, even with our N95 masks, the smoke smell was overpowering. We even went so far as to call a restoration service, something we as die hard DIYers wouldn’t normally consider. This particular company said they only did smoke remediation after a fire not after chain smokers to we pressed on.
The previous owners of the house not only used a wood stove that may or may not have had a significant amount of creosote, they must have considered smoking a passion, not just a habit. The ceiling is yellow. It’s hard to see just how yellow until you start scraping. After you scrape, the slurry smells like plastery nicotine. I guess what they say is true, smoke rises. Maybe it was heat rises but either way, if you are trying to eliminate smoke smell from a house, you will need to scrape the popcorn ceiling.
The original plan was to Kilz everything maybe even fashion some sort of “Kilz” bomb to cover it all. The nooks and crannies of the popcorn ceiling made me rethink this plan and even though it is a filthy job, the popcorn ceiling had to go.
At night when I lay awake and question my life choices, including the one to buy a hoarder/smoker house with falling down everything, I find myself thinking about popcorn ceilings. I have never met someone who says, “boy I really like the looks of that cottage cheese texture on the ceiling.” As a child who jumped on her bed even though it was forbidden, I would hit my head on the very sharp “textured” ceiling. I am sure I will eat these words after we eventually paint these ceilings and I will become obsessed with every imperfection. I have a hard time believing it can look worse than they did before we started and I know they will smell better regardless of the “smoothness.”
You may have read about our initial foray into ceiling scraping here. There are two major things we did differently this time.
Popcorn ceiling removal, part deux
First, we put down a drop cloth. We used a cheap, thin, plastic drop cloth. It worked well and the static caught a lot of the dust. Clean-up was a breeze, we just folded the drop cloth over and whisked the mess into a bag.
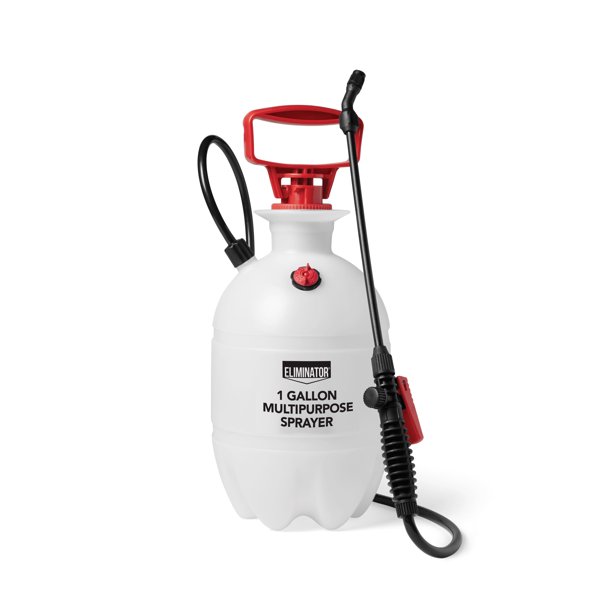
Second, we used a larger sprayer. This 1 gallon sprayer was much more effective in evenly wetting the ceiling. It was more ergonomic to pump the handle vs squeezing the spray bottle. without being unwieldy.
This job is still makes gigantic mess, if you have a shower cap/bouffant cap, use it. Eyewear and a mask as also essential, getting plaster in your eyes and lungs is a bad idea. As you can see, the ceiling look so much better. I can’t wait to Kilz everything. I am even considering using the oil based Kilz on the subfloor.
the slow slog in the dining roomafter scraping bedroomanother dark and terrible photo
If anyone needs be to take some dark and blurry photos of their house, send me a message!
The right tools always make the job easier. If you are removing a popcorn ceiling, learn from our mistakes! The amount of dust we created by scraping too dry and without the static/dust collecting drop cloth was ridiculous. You don’t want to over wet the ceiling either but this mist sprayer made a hug difference.
Yesterday I ran my fastest 5k. I am still getting over the sting of being in the 45-49 age bracket, it really doesn’t seem possible. At least I can take solace in the fact that I did indeed, run my fastest 5k. As soon as the throng of humanity is released at the start line, I take off. Maybe not as fast as some, but much faster than I would ever run on my own.
I will preface by acknowledging that a 24 minute 5k is not an impressive feat for many people. People like the rest of my family. My 12 year old ran a sub 21 minute race, the rest of them were even faster. For me, a woman of experience and wisdom, a sub 25 min 5k seemed impossible 2 years ago so to set a goal of sub 24 was like auditioning for Star Search! Dare to dream!
She might be wearing Hokas.
This winter, I took a break from races. I started feeling my wanna-be next hammer-toe start aching after my Christmas Town Dash 8k in December and decided to give myself a break. I still ran, but tried to find the warmest part of the day and took it pretty easy. I’ve picked it up slightly in the past month, averaging around 15 miles a week at a comfortable pace. Speed has not been my focus. I was apprehensive going into this 5K as my “comfortable” pace is easily 1 minute to a minute and a half slower than my last 5K pace. Towards the end of last year, I wanted to break the 24 minute mark for a 5K, I was somewhere around a 24:20 in my best race.
Yesterday, I ran a 24:04. I did not meet my goal of being sub 24 but now I really believe that it is possible. Sometimes we need to rethink the purpose of a goal. It’s not a failure if we don’t meet the goal, it’s a failure if we don’t give it our best shot.
If I can keep getting faster, despite my advancing years, I am inspired to think of all of the other things I can get better at. Or learn. We are never too old to learn new tricks!
So why is it that I run so much faster in a race? Am I just a lazy runner the rest of the time? I am assuming that adreneline has a lot to do with it. Running 5-6 miles vs 3.1 could help as well. Either way, I don’t particularly enjoy running fast so it would be difficult to force myself to run at race pace when I am not being pursued by my rivals.
Two things I am loving right now. My shoes and my socks! I am on the second exact pair of these Topos, they have a wide toe box, zero drop and they look nice! Unlike many wide toe-box shoes, you won’t look like you stole the bowling alley rejects.
Not a Hoka
I find that my socks make a huge difference, I tend to get large callous build up near my bunions and my little toe gets rubbed my any seams. I found these oddly named, Thirty48 socks. The ones I tried are ankle cut compression socks with a tab back. These socks are made for left and right feet specifically. I found they greatly reduced the friction I had been experiencing. If you have bunions and like a zero drop, try these shoes!
Pretty colors. Also not a Hoka.
I like these socks so much that I have been hand washing them. Really my only reason for doing so is that I will never remember to keep them out of the dryer! I don’t want them to shrink! This is a huge commitment from me, I don’t own anything that is hand wash only and have never taken anything to the dry cleaner. These socks are worth it! These are best socks I have found for running with bunions!
We chose our house for many reasons. The interior was not one of those reasons. Unfortunately, the previous owner was unable to care for the house and had neglected much of the cleaning and maintenance. Between the wood stove and what must have been a pretty steady stream of cigarette smoke, the house needed more than a simple airing out. The first thing we needed to do was to get rid of the carpets.
I lied, the first thing I did was cut this bush down!
I had to stop myself from doing this until after the closing, it was very difficult for me.
Tips for pulling up old carpets
Hire someone else to do it. Ha, ha, Goonies always say DIY!
Wear a respirator or an N95 mask. In our case there was so much dust and dirt and I know the smoke smell would have been overpowering without one. Lung damage is cumulative, please protect your future health.
Along this line of thinking, protective eye wear, a simple thing can make a big difference
Work gloves, heavy duty. There are staples and sharp edges.
Cut the carpet into a size that will be easy to move and to dispose of. At first, we were a tad too ambitious. Carpet, particularly soiled carpet is heavy. We hauled it straight out to the woodshed but would have put it into a trailer or truck if that had been an option.
Keep the underlayment rolled as much as possible to catch more dirt. It likes to tear but if you cut all the way through you should be able to roll that up as well.
Once we pulled out the carpet, the smell was actually worse. My guess is that the smoke had settled to the sub floor. We made sure all of the doors and windows were open and swept up the dirt. There was a lot of dirt, the carpet was at least 20 years old. A shop vac made quick work of the piles but I found it easier to use the broom on the actual floor.
It was at this point that I decide to start removing the popcorn ceiling. Not only was it pretty stained but I imagine that it held a lot of the nicotine/smoke smell. I watched a few tutorials about removing a popcorn ceiling so I was pretty much an expert. I will share with you what I learned.
Hire someone else to do it. I jest.
It will either be easy remove or impossible so you might as well find out which one it is.
Take a spray bottle of water. Sprtiz an area of the popcorn ceiling, wait a few seconds and then take a putty knife/drywall taping knife, lay it flat and attempt to remove the offensive ceiling. Keep a fairly flat angle to avoid gouging. If it comes off, it will just be a long and tedious process. And messy.
If the ceiling was painted, there is a whole other level to the process, they make a removal solution. As one of the “lucky” ones, my ceiling shed its popcorn layer like a snake.
A lot of the tutorials focus on the mess. I will not lie, removing a popcorn ceiling makes a huge mess. I didn’t read anything good about the scraper/catcher combo, though anything made by HoMax has to be suspect.
The next room we do, I will perform a “Dexter” style drop cloth set-up. The electrostatic charge will hopefully catch some of the microdust and once it settles, I will bundle the offensive material away.
Along the way I have been deep cleaning the kitchen and all of the walls. I suppose I should wait until the ceilings are scraped to wash walls but the smell is pretty strong so I am doing all that I can to minimize is as soon as possible. Here is a teaser of the wall washing…
There will be many acronyms in this series, most of which will be WTF or WTH. Let’s imagine for a moment that you are having a mid-life crisis. The world is still sorting through a 2 year pandemic, your work world is still upended, you have 2 children one of whom is taking 5 AP classes and there is a strong possibility of nuclear war. Let’s add in inflation, a shadow puppet presidency and a supply chain crisis. It would seem the most logical thing to do is to buy a small farm with a house that has been neglected for several years. This is the only sane choice for a couple with more energy and ambition than is appropriate for their age.
How we found the farm and a house in need of many, many repairs
As people who act impulsively, we have used the Goldilocks approach to finding the right fit for our mid-life crisis house. As documented here, in the beginning of the pandemic we bought a piece of land, cleared a portion and installed a shed-cabin. The lack of water and the terrifying drive up the old logging road coupled with the fact that my kids hated it, made this a less than ideal situation. We then bought an actual real cabin in a beautiful spot but it was a 5 hour drive from our “real” house and getting there took too much of our limited time.
Some people would spot a pattern and perhaps give up the idea of having a mountain get away when you have jobs and kids. We are not “some” people, we are “those people.” The people who believe they can do anything they set their mind to. The people who are always “Learning New Tricks!”
In keeping with the Goldilocks approach, we had already learned a few things. The shed cabin was too rustic (hey kids, there is a line to use the bathroom bucket!) The other house was simply too far away. We made a list of what would make it “just right!” We decided that 3 hours was the maximum distance we wanted to travel to a mountain house. Ease of access was important, no single lane logging roads. A place we could actually live when we were retied without feeling like bush people. Quiet but not remote. We settled on looking around one of our favorite areas in Virginia, the Staunton/Lexington area.
Mountain house/retirement house must-haves
Structure-While I love the idea of raw land and I am always looking at this as an investment, for this time in our life and with the shortages of labor and materials, we were looking for an actual house, complete with indoor plumbing and electricity.
Elevation-The higher you are the cooler it will be in the summer. I was trying to find a place around 2000 ft elevation but most of the cabins/houses in this elevation tended to be pretty remote or too far for us to drive.
Cleared, open land– while I know that most people hire others to do work, as obsessive DIYers I know the time, expense and incredible mess clearing land takes. With one kid a year and half away from college, I wanted to minimize my time frame for usability. Fewer bugs is another plus or having open and cleared land!
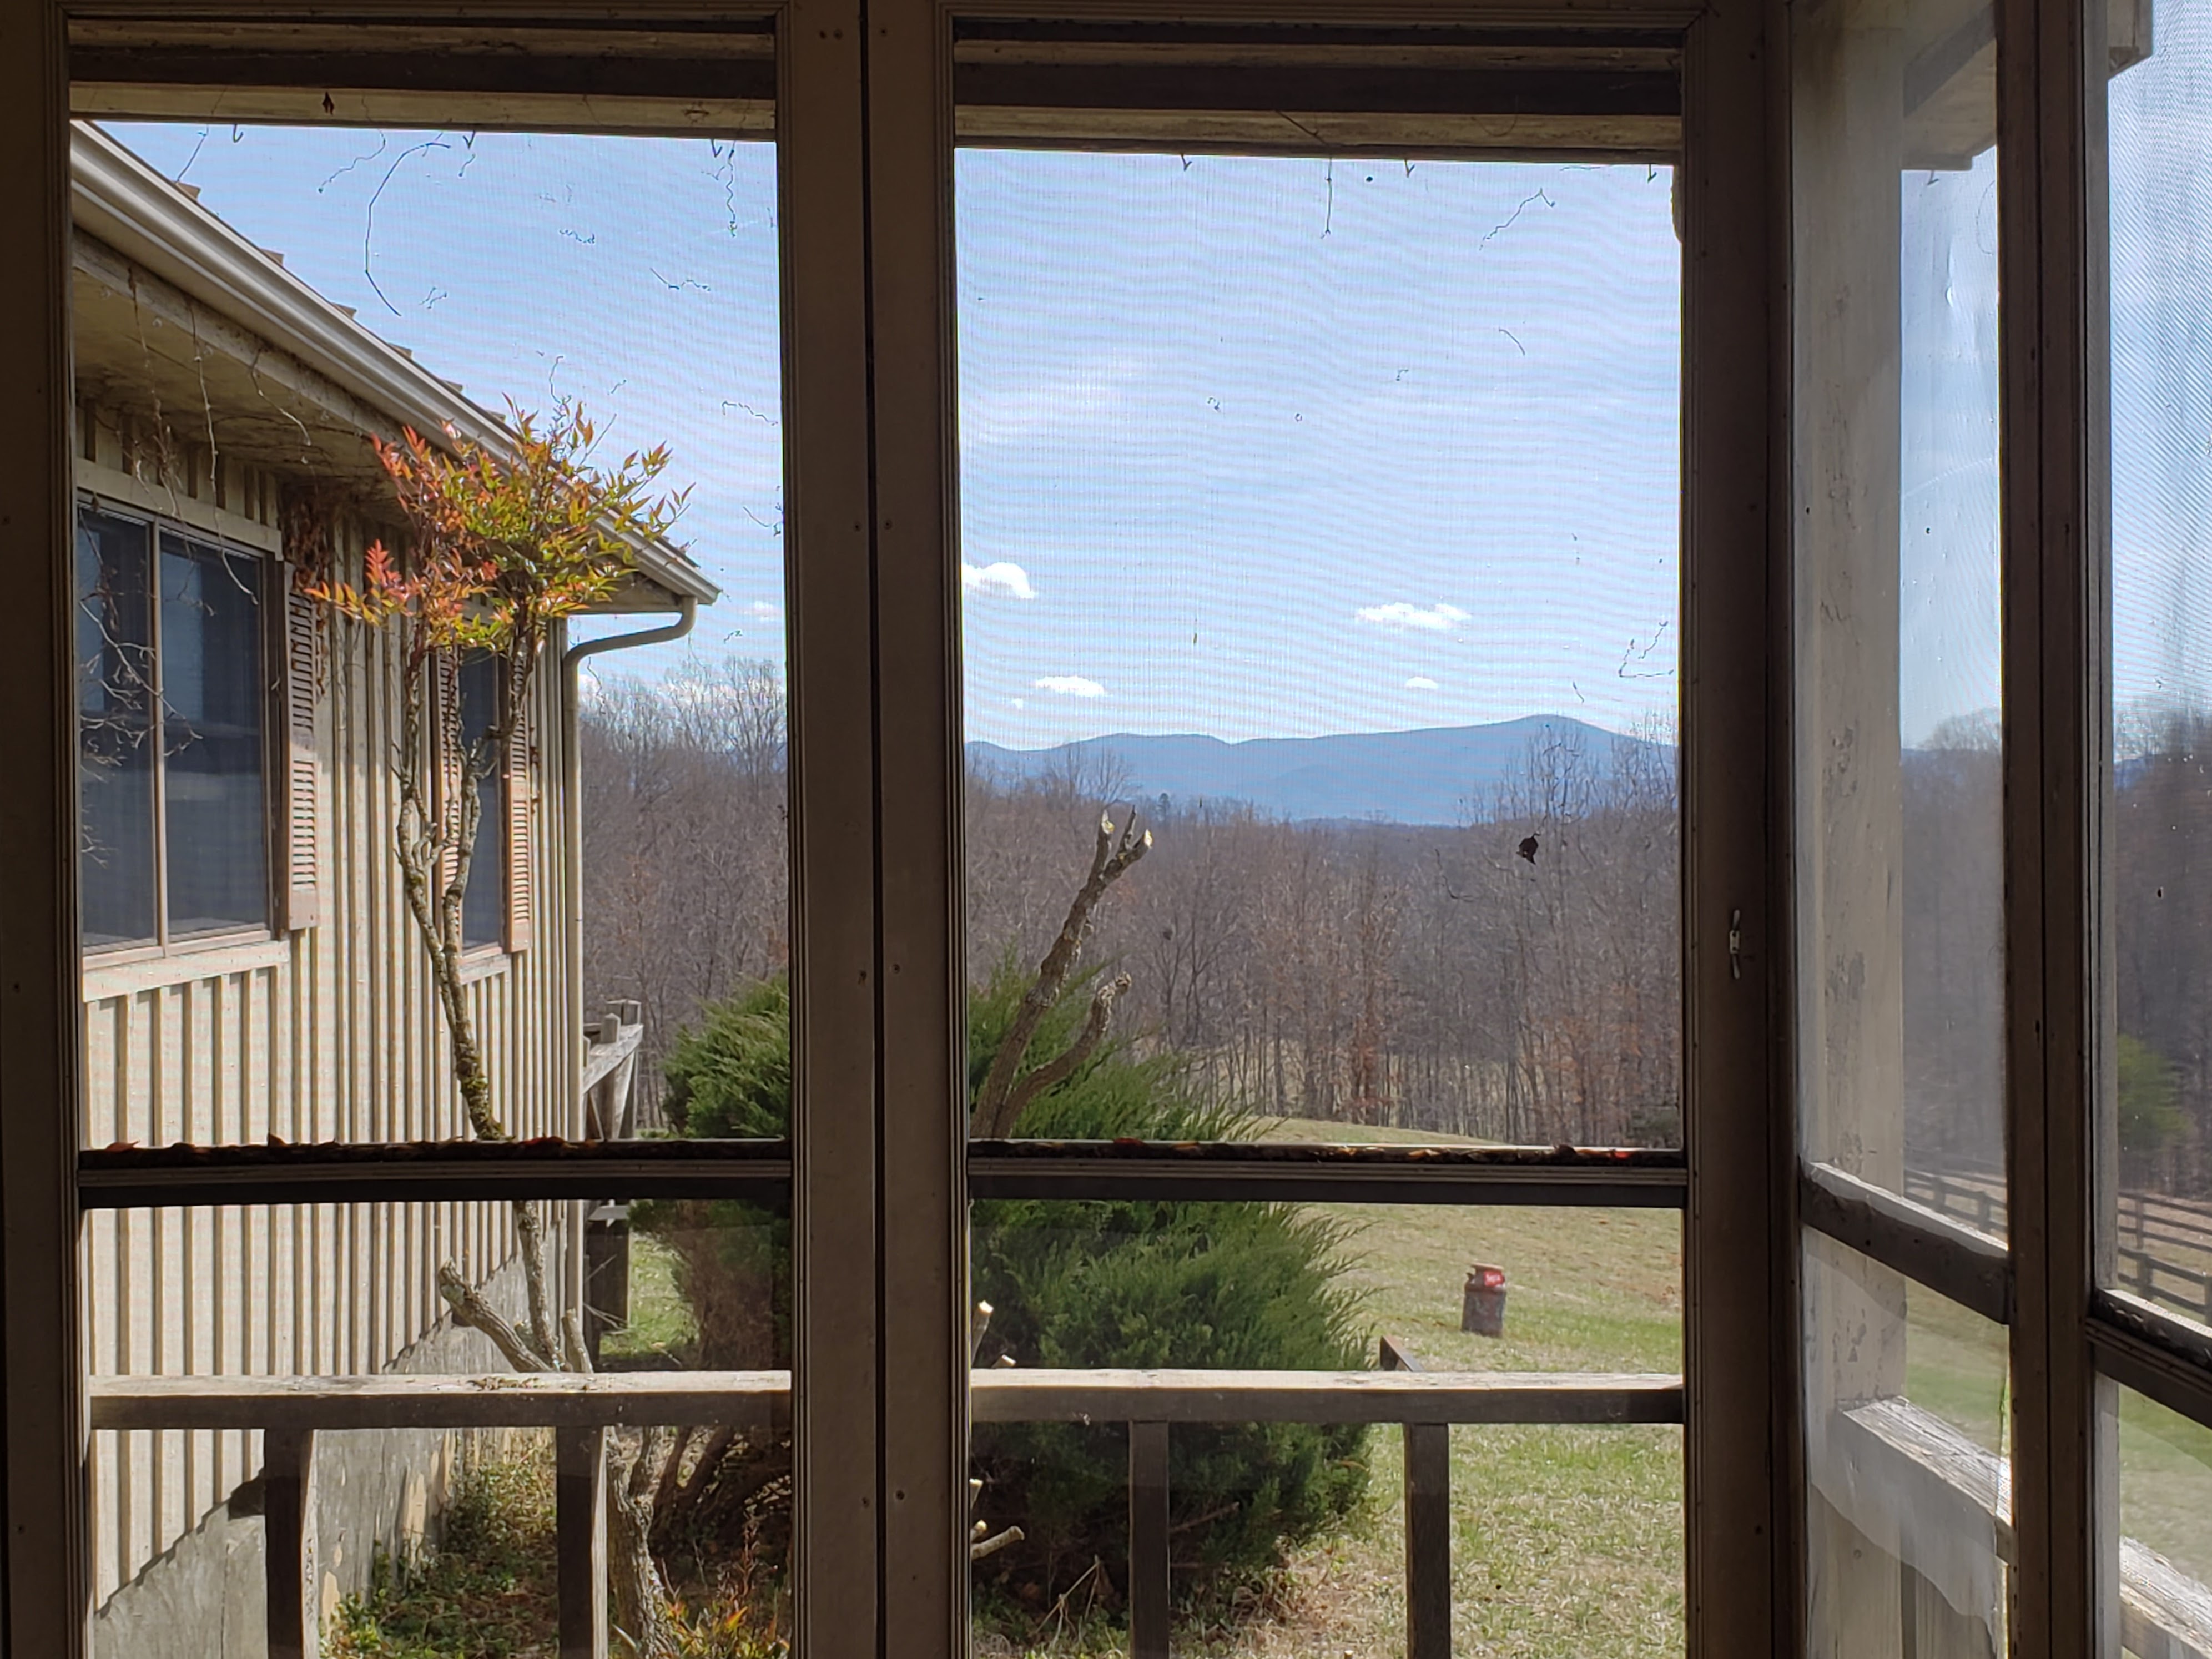
View- I wanted a vista. A view that moves you. I wanted to be able to see a sunrise or a sunset. For our entire marriage we have lived in a lovely but wooded settings. I wanted that wide-open space with a view!
Location– Real estate 101. Having tried the beautiful area within an hour of nowhere, I wanted to have a destination where finding stuff to do was easy. Outdoor recreation and proximity to National and State parks as well as rivers for kayaking was a must.
Privacy- I have issues. I don’t like to see neighbors.
Town- I like the idea of being close to but not necessarily in, a living and breathing town.
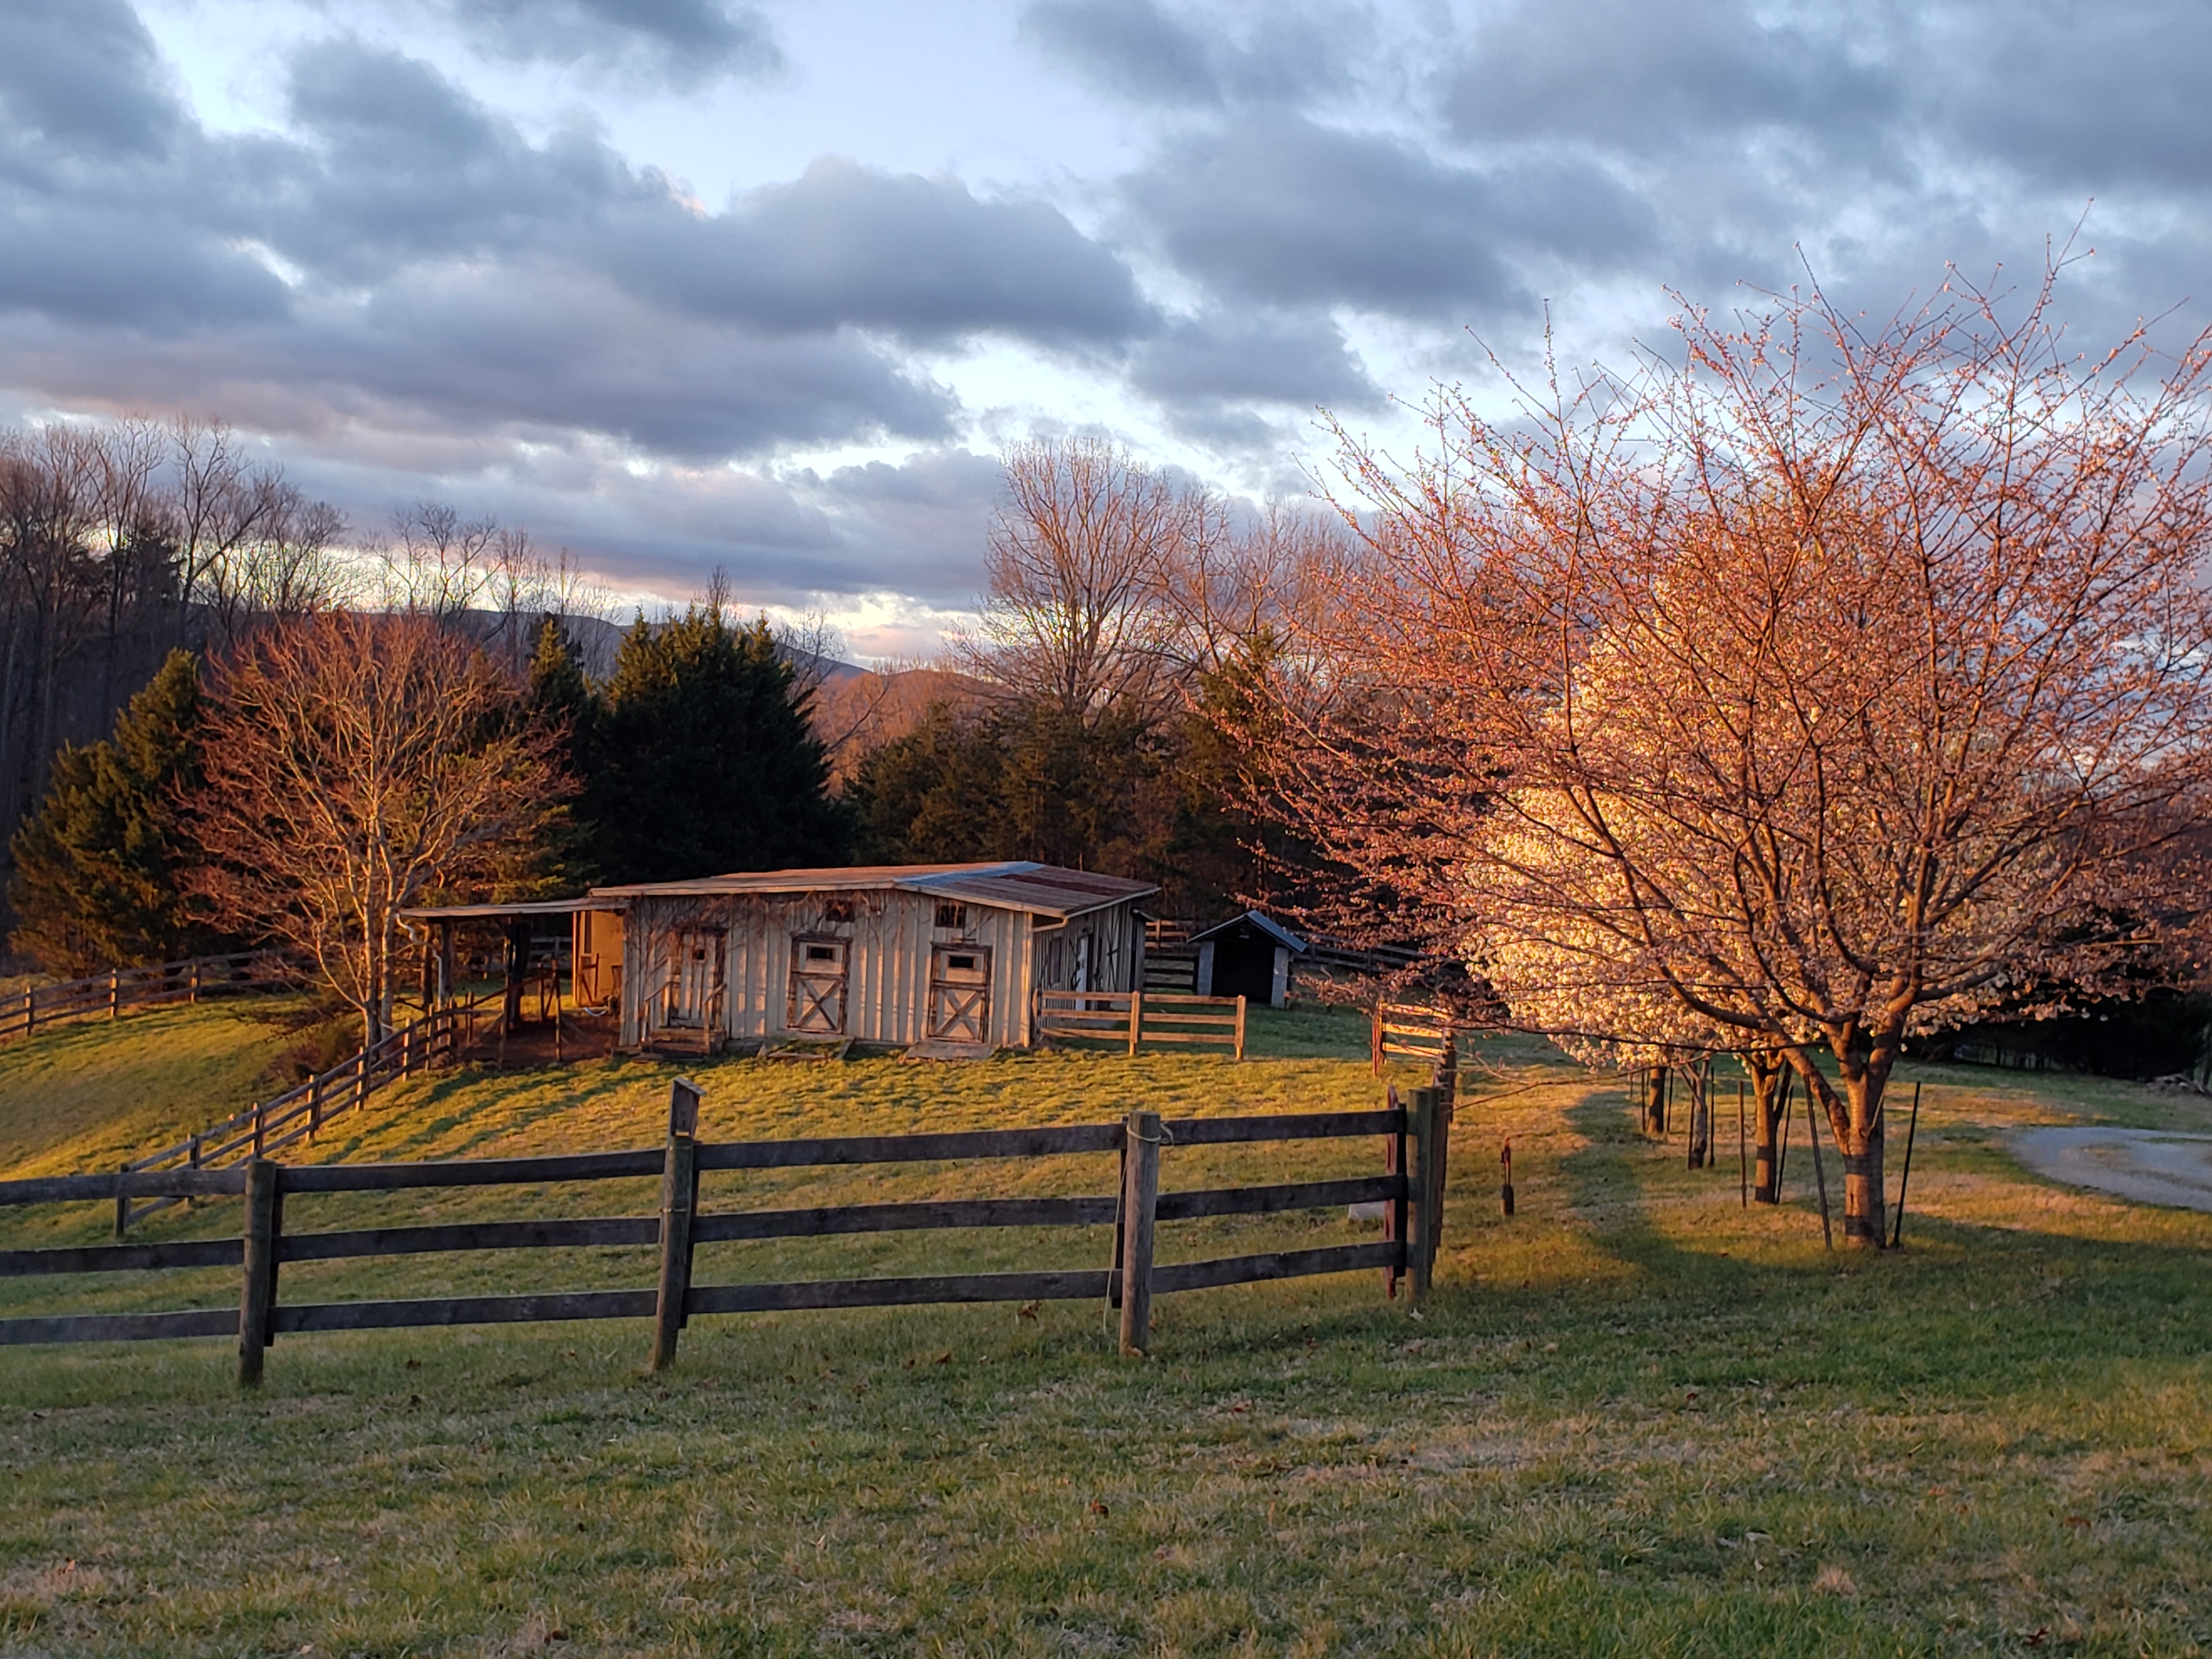
Why we chose this house
Reason 1:
We love the Lexington, VA area! Having spent a lot of time in this area, we know that there is a ton of outdoor recreation, mild weather and access to stores. There are two colleges in town which adds to the eccletic climate of this beautiful mountain town.
Reason 2:
The view! Meeting both my need for privacy, open land and a view!
Reason 3:
There is an acutal house! And so. many. sheds. We could turn them all into cabins, each with their own toilet bucket!
We bought the farm
Literally and hopefully not metaphorically. I will try my best to document the progress. We will likely do a major renovation 5 ish years out, for now, I am trying to make is livable and keep the house from deteriorating.
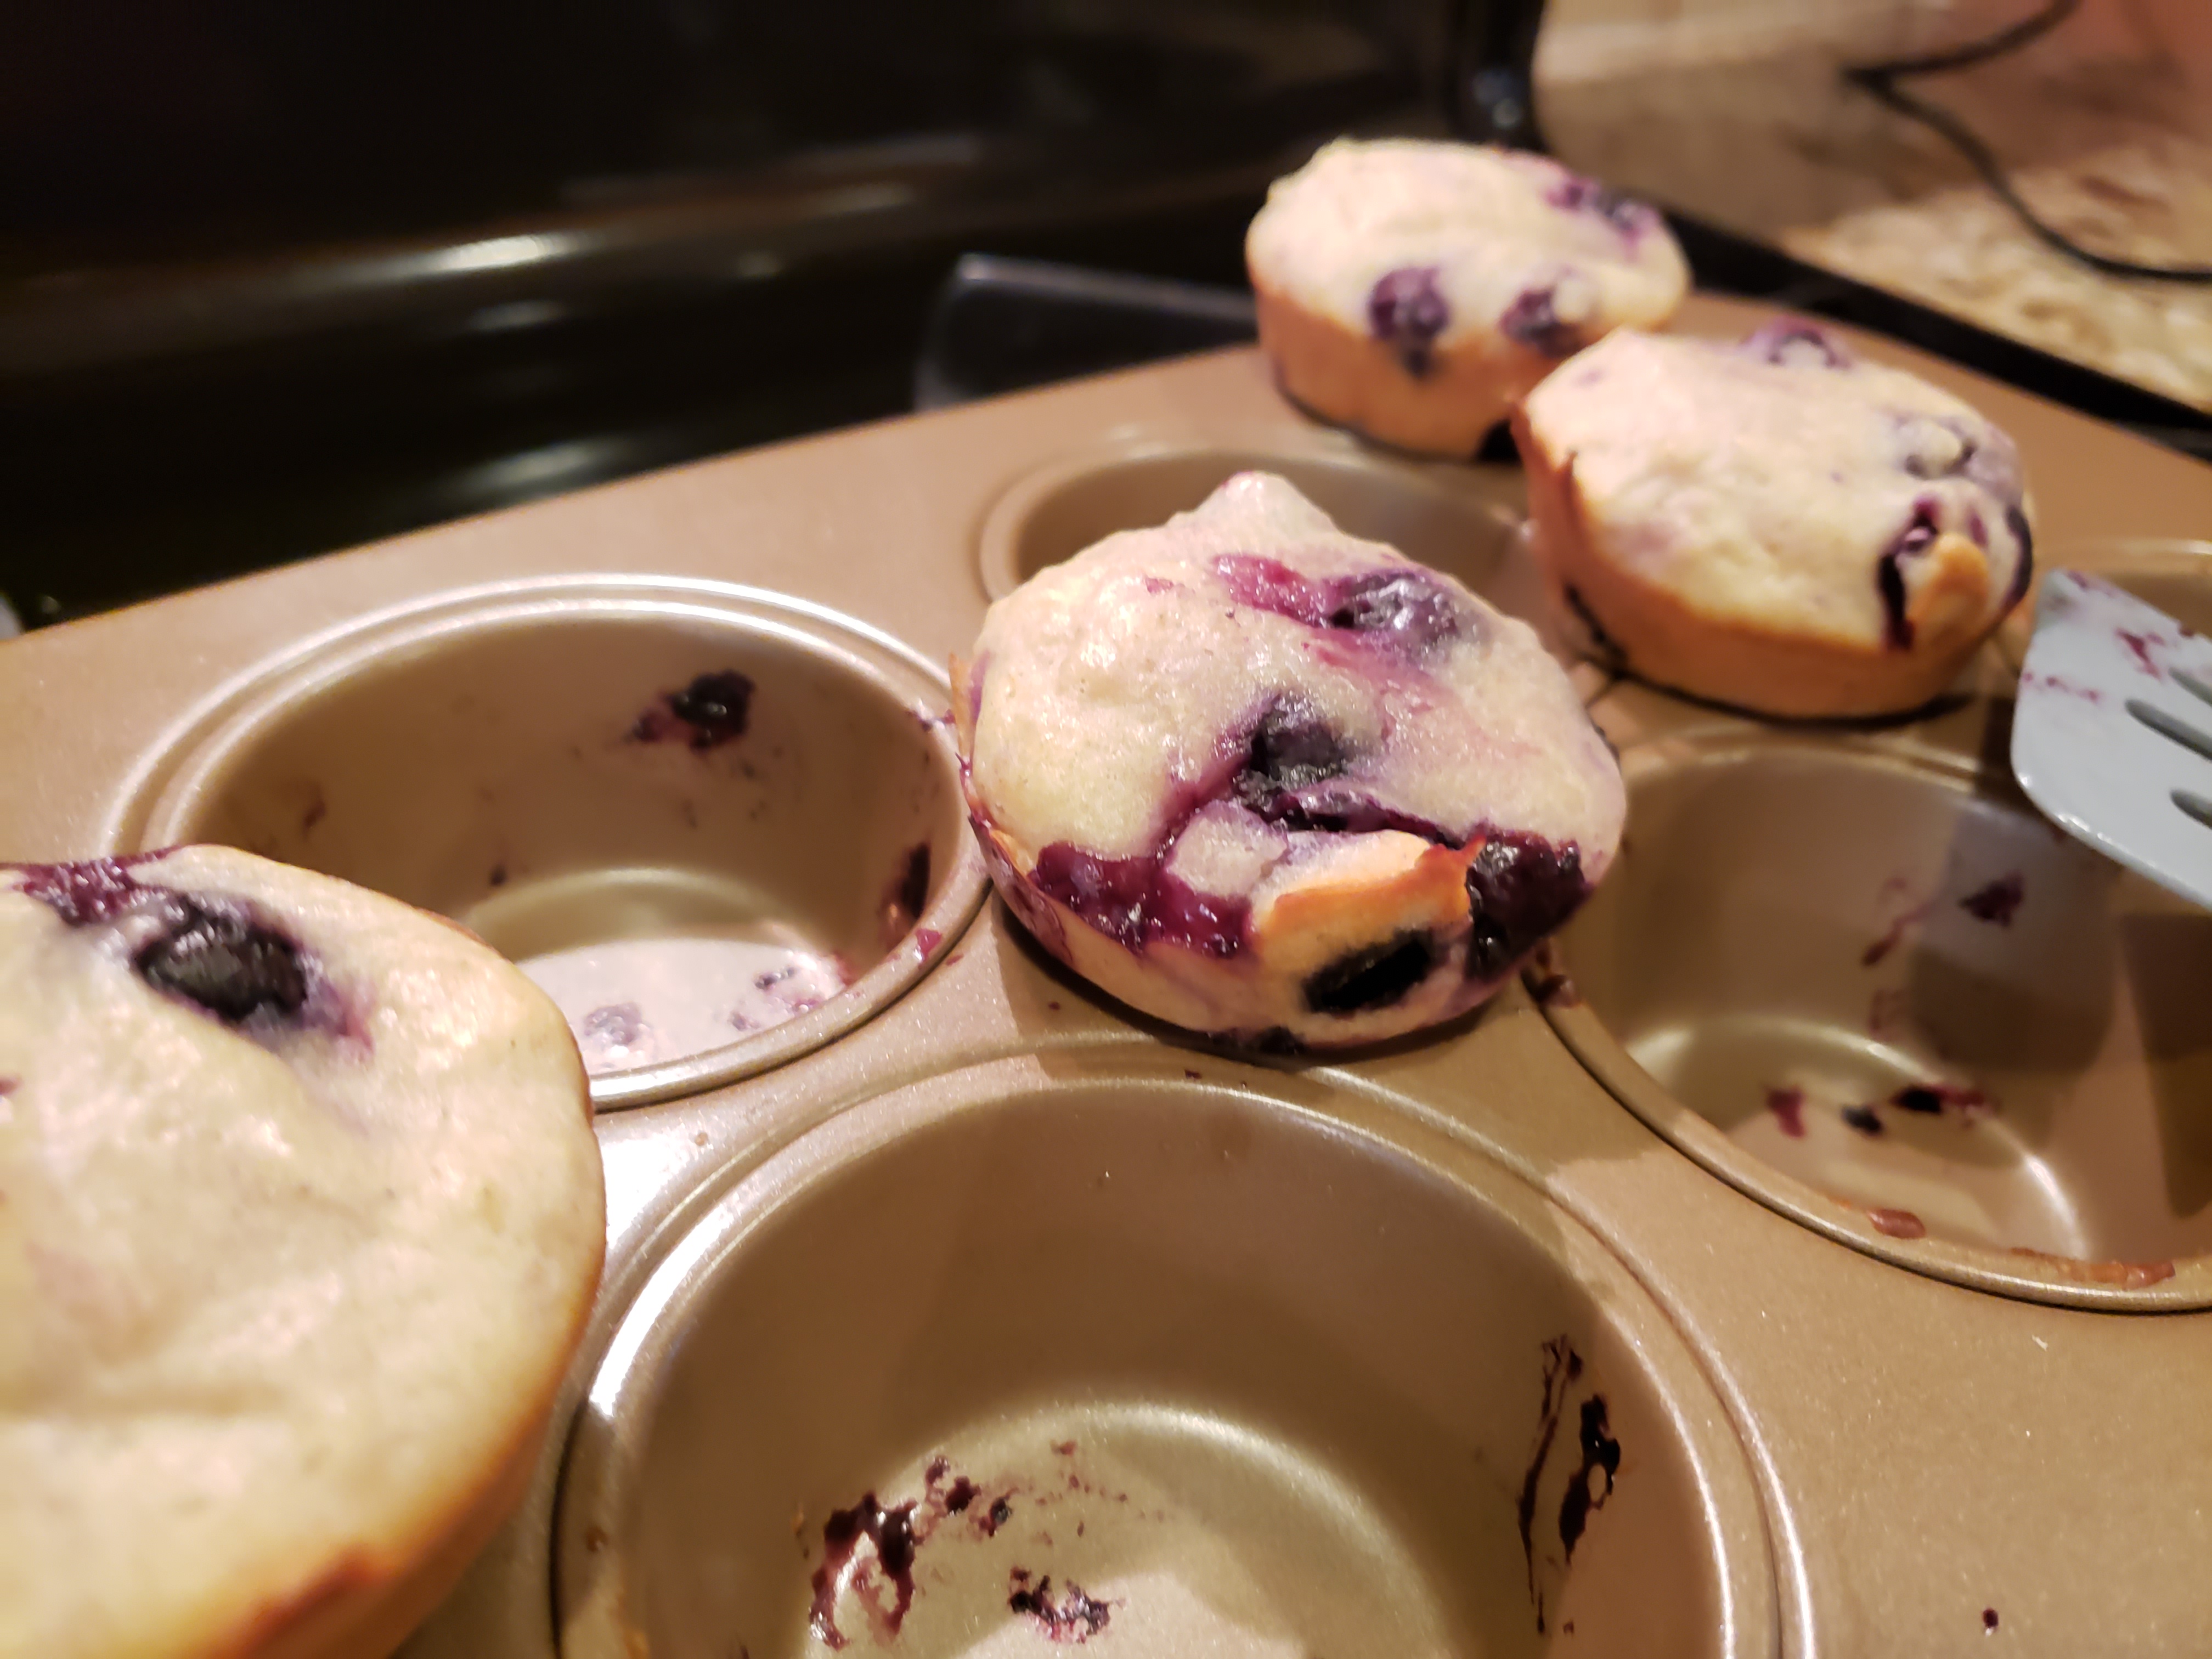
The first step to making a terrible muffin is to try an entirely unfamiliar recipe. The second is to not follow the recipe. Follow me for more tips on making “No-Rise Blueberry Muffins!”
In attempt to inspire my middle school-aged daughter to excel in her opening season track meet the following morning, we watched the movie, “Miracle.” The movie isn’t as good as the documentary, “Miracle on Ice.” The best part of the movie is that the Boston and Upper Midwest accents are actually good. After watching Julianne Moore’s cringy Boston accent in “30 Rock,” of was refreshing to hear something that sounds passable. I learned later that this was because most of the people in the movies were actual hockey players who were taught to act rather than the other way around. Drama in real life, if you will. Perhaps I had hockey on the brain when I made these delectable little treats. These “muffins” could not be bound by ordinary properties of physics, the parts could not have possible created a sum this dense.
Have you ever baked something and thought, “I should probably do this professionally, it would a shame to deprive the world of such skill and technique.” I have not.
Here is the recipe, for Lemon Blueberry Breakfast Muffins. It promises to be so delicious that, “even picky toddlers” will love these muffins. No mention about mouthy teenagers or husband’s with above average baking skills.
The past few times I made anything with frozen blueberries, I had a few bites that were, “off.” Sour, tangy in an unpleasant way, I figured it was the berries but realized after opening a new bag that it was the baking soda/powder reacting with the berry acid (scientific name.) Refusing to break my hard-line rule about only using ONE bowl when baking, I diligently mixed up and sifted (by fluffing the flour in the air as I measured) my dry ingredients before adding my wet. I gently folded in my berries with all of their acids and then waited. Around the half-way point, I turned the muffin pan 180 degrees, I noted that they seemed a little flat but as this was a yogurt based muffin, I thought they just had to overcome a little more whole milk weight before rising. I was wrong. The timer dinged and when I opened the oven, they were still little muffin pucks. The good news is they did not have that unpleasant “zingy sour” taste of muffins past. The bad news is I had entirely omitted and baking powder and or soda from the mixture.
Rare photo of the pucks as they emerge from their holes.
Thankfully, I skipped the struesel topping. Who knows what horrors I would have inflicted upon the world. At least they could have supported the extra weight, birthing hips on these muffins.
My kids laughed at me. I ate them anyway. Food photography is not my thing and neither is baking. When life hands you blueberries, make hockey pucks but wait until the morning after the race. My daughter ran her little heart out, owing largely to the fact that she had not yet consumed any of the lead-based muffins. Perhaps if she had known what awaited her, she would have run even faster in the opposite direction.